
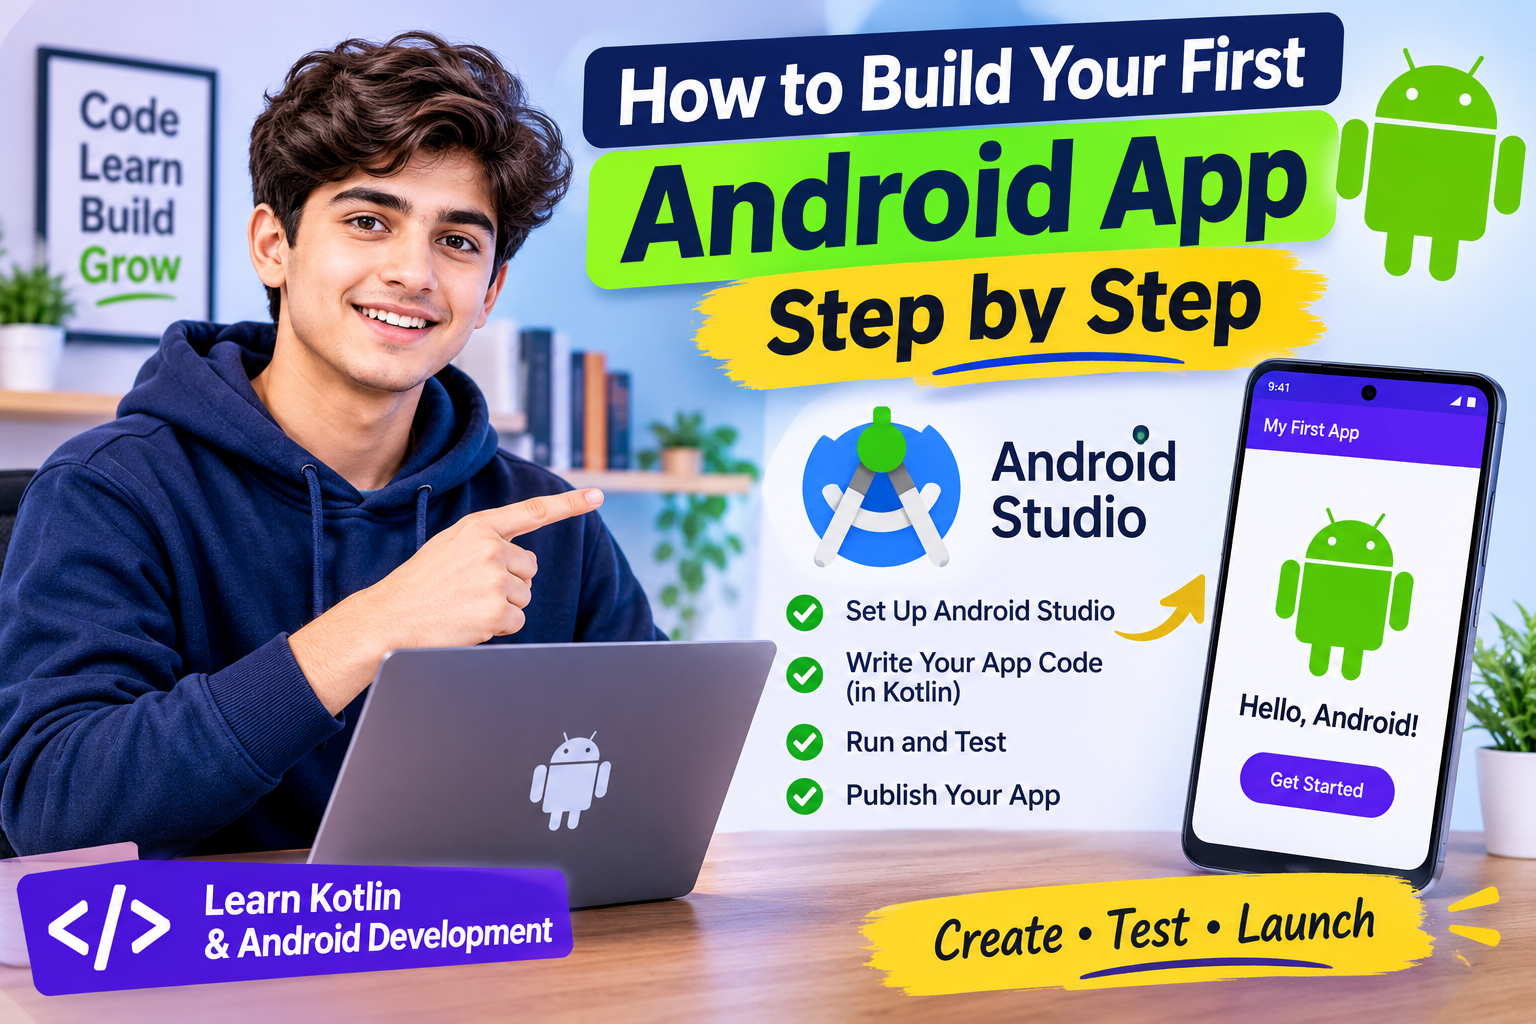
Android applications have become an important part of everyday life. From banking and online shopping to education, entertainment, fitness, and communication, millions of people use Android apps to complete everyday tasks. Behind every application is a development process that combines programming, user interface design, testing, and problem-solving.
If you are interested in becoming an Android developer, building your first application is an excellent way to begin. However, getting started can feel confusing when you encounter programming languages, development environments, project structures, XML layouts, Gradle, and other technical terms.
The good news is that you do not need years of programming experience to create a basic Android application. With the right tools, a structured learning approach, and consistent practice, beginners can build functional applications while gradually developing their technical skills.
In this guide, you will learn how to build your first Android app step by step using Android Studio and Kotlin. We will cover the development environment, project setup, essential programming concepts, user interface creation, practical coding examples, testing, debugging, and application publishing.
By the end, you will understand the complete beginner-level Android development workflow and have a foundation for creating more advanced applications.
10. Understanding Android App Development
Android app development is the process of creating software applications that run on devices powered by the Android operating system. These applications can be used on smartphones, tablets, smart TVs, watches, and other supported devices.
Developers use programming languages, development frameworks, design tools, and testing environments to create applications that perform specific tasks.
For example, a simple calculator application performs mathematical operations, while an e-commerce application manages products, shopping carts, customer accounts, and orders.
Native Android App Development
Native Android development means creating applications specifically for Android devices using Android-supported development technologies.
The main technologies include:
-
Kotlin: A modern programming language recommended for Android development.
-
Java: An established programming language that continues to be supported.
-
Android Studio: The official integrated development environment.
-
Jetpack Compose: A modern toolkit for creating Android user interfaces.
-
Android SDK: A collection of tools and libraries used to develop Android applications.
Native development is particularly useful when an application needs access to Android platform features, device hardware, notifications, sensors, or advanced operating system capabilities.
Different Approaches to Android App Development
There are several ways to develop mobile applications.
| Development approach | Description | Suitable for |
|---|---|---|
| Native development | Builds applications specifically for Android | Android-focused projects |
| Cross-platform development | Shares code across multiple operating systems | Android and iOS projects |
| Hybrid development | Combines web technologies with a native application container | Web-based mobile applications |
| No-code development | Uses visual tools instead of traditional programming | Simple applications and prototypes |
For this tutorial, we will concentrate on native Android development using Kotlin and Jetpack Compose.
Why Choose Kotlin for Android Development?
Kotlin is a modern programming language designed to work with the Java ecosystem. It provides concise syntax, type safety, and features that help developers write maintainable application code.
Some important advantages include:
-
Readable syntax: Kotlin often requires less code than equivalent Java implementations.
-
Null safety: Its type system helps reduce common null-related programming errors.
-
Java interoperability: Kotlin can work alongside existing Java code.
-
Modern development support: It integrates with Android development libraries and frameworks.
-
Coroutines: It provides language features that simplify asynchronous programming.
If you want to understand the programming language in more detail, explore the ToolMentors guide on Android App Development with Kotlin when that page is available on your site.
11. Tools and Technologies Required to Build Your First Android App
Before creating an Android application, you need to prepare a development environment. This environment includes the software, programming language, SDK components, and testing tools required to build and run your project.
Android Studio
Android Studio is the primary development environment used in this tutorial.
It provides:
-
Kotlin code editing.
-
Project and file management.
-
Android SDK integration.
-
Application build tools.
-
Code completion.
-
Debugging.
-
Device emulation.
-
Performance analysis.
Android Studio also includes project templates that provide starter code, helping beginners avoid creating every project file manually.
Kotlin Programming Language
Kotlin is the language we will use to write the application logic and user interface.
You should understand a few basic concepts before building your first project:
-
Variables and data types.
-
Functions.
-
Conditional statements.
-
Classes and objects.
-
Lists and collections.
-
Basic event handling.
You do not need to master every advanced Kotlin concept before starting. Learning through practical projects is often more effective.
Jetpack Compose
Jetpack Compose is a modern toolkit for creating Android user interfaces using Kotlin.
Instead of defining the entire interface through traditional XML layout files, developers describe the interface using Kotlin functions called composables.
For example:
@Composable
fun WelcomeMessage() {
    Text(text = "Welcome to Android Development!")
}
The @Composable annotation identifies a function that describes part of the user interface.
Compose also provides components for buttons, text fields, layouts, lists, images, and other interface elements.
Android SDK
The Android Software Development Kit provides the libraries and development tools required to build Android applications.
It includes components such as:
-
Android platform APIs.
-
Build tools.
-
Platform tools.
-
Debugging utilities.
-
Emulator support.
-
Device communication tools.
Android Studio helps you install and manage the SDK components required by your project.
Android Emulator
An Android emulator allows you to run an Android application on your computer without needing a physical smartphone.
You can use it to test:
-
Application navigation.
-
Screen layouts.
-
Button interactions.
-
Different device configurations.
-
Application startup behavior.
-
Basic functionality.
A physical Android device is also useful because it allows you to evaluate performance and behavior on actual hardware.
12. System Requirements Before Installing Android Studio
Android Studio can use considerable computer resources, particularly when running an emulator.
Before installation, check that your computer meets the requirements for the Android Studio version you intend to use.
| Requirement | What to check |
|---|---|
| Operating system | Supported Windows, macOS, or Linux version |
| Processor | Compatible 64-bit processor |
| RAM | Sufficient memory for the IDE and emulator |
| Storage | Enough free disk space for SDKs and projects |
| Internet | Stable connection for downloads and Gradle dependencies |
| Virtualization | Hardware virtualization support where required |
The exact requirements change between software releases. Check the installation requirements for your selected Android Studio version before downloading it.
Practical recommendation: If your computer has limited RAM, consider testing your application on a physical Android phone instead of running a resource-intensive emulator.
13. Step-by-Step: How to Build Your First Android App Using Kotlin
Now let’s create a practical Android application.
For this project, we will build a simple Welcome App that displays a greeting and allows users to interact with a button.
This project introduces the basic Android development workflow without overwhelming beginners with unnecessary functionality.
Step 1: Download and Install Android Studio
First, install Android Studio on your computer.
Follow these steps:
-
Open your preferred browser.
-
Visit the official Android Studio download page.
-
Download the version compatible with your operating system.
-
Open the downloaded installer.
-
Follow the installation instructions.
-
Allow the setup process to install the required Android SDK components.
-
Launch Android Studio after installation.
During the initial setup, Android Studio may download additional development components. Allow the process to finish before creating your first project.
Step 2: Create a New Android Project
After launching Android Studio, you will see the welcome screen.
Follow these steps:
-
Click New Project.
-
Select the Phone and Tablet category.
-
Choose Empty Activity.
-
Click Next.
-
Enter your project information.
Use the following example configuration:
| Setting | Example value |
|---|---|
| Name | MyFirstAndroidApp |
| Package name | com.example.myfirstandroidapp |
| Language | Kotlin |
| Minimum SDK | Select a suitable supported API level |
| Build configuration | Use the template defaults |
The Empty Activity template is a suitable starting point for a new Jetpack Compose project.
Click Finish to create your application.
Android Studio will generate the project structure and download or configure the necessary dependencies.
Step 3: Understand the Android Studio Interface
Once your project opens, you will see several important areas.
Project panel: Displays application files, packages, resources, and project configuration.
Code editor: Allows you to write and modify Kotlin code.
Design or Preview panel: Shows a visual preview of supported Compose interfaces.
Toolbar: Provides controls for running, debugging, and building the application.
Logcat: Displays application logs and useful debugging information.
Beginners should become familiar with these sections before adding more complicated functionality.
Step 4: Understand the Main Android Project Files
An Android Studio project contains several directories and configuration files.
| File or folder | Purpose |
|---|---|
MainActivity.kt |
Main activity and application interface entry point |
AndroidManifest.xml |
Declares application components and permissions |
build.gradle.kts |
Project-level build configuration |
app/build.gradle.kts |
Application module dependencies and settings |
res/ |
Images, strings, themes, and other resources |
ui/theme/ |
Compose theme configuration |
test/ |
Unit testing source files |
androidTest/ |
Instrumented testing source files |
The exact structure can differ depending on the template and Android Studio version.
For your first project, concentrate on MainActivity.kt. This is where you will make the initial changes to the application interface.
Step 5: Understand the MainActivity.kt File
Open the MainActivity.kt file inside your application package.
The generated code usually contains an activity similar to this:
class MainActivity : ComponentActivity() {

    override fun onCreate(savedInstanceState: Bundle?) {
        super.onCreate(savedInstanceState)

        setContent {
            MyFirstAndroidAppTheme {
                Greeting("Android")
            }
        }
    }
}
Let’s understand the important elements.
MainActivity: The activity represents an application screen and provides an entry point for the interface.
onCreate(): This lifecycle method is called when the activity is created.
setContent(): Sets the Compose content displayed by the activity.
MyFirstAndroidAppTheme: Applies the theme generated for your project.
Greeting(): Represents a composable function responsible for displaying content.
The application starts by creating its activity and displaying the interface defined inside setContent().
Step 6: Create Your First Android User Interface
Now we will create a simple welcome screen.
The screen will contain:
-
A heading.
-
A welcome message.
-
A button.
-
A message that changes when the button is pressed.
Open MainActivity.kt and replace the generated content with the following complete example. Keep the package declaration generated by your project at the top of the file.
import android.os.Bundle
import androidx.activity.ComponentActivity
import androidx.activity.compose.setContent
import androidx.compose.foundation.layout.Arrangement
import androidx.compose.foundation.layout.Column
import androidx.compose.foundation.layout.fillMaxSize
import androidx.compose.material3.Button
import androidx.compose.material3.MaterialTheme
import androidx.compose.material3.Surface
import androidx.compose.material3.Text
import androidx.compose.runtime.*
import androidx.compose.ui.Alignment
import androidx.compose.ui.Modifier
import androidx.compose.ui.unit.dp
import androidx.compose.foundation.layout.padding

class MainActivity : ComponentActivity() {

    override fun onCreate(savedInstanceState: Bundle?) {
        super.onCreate(savedInstanceState)

        setContent {
            WelcomeApp()
        }
    }
}

@Composable
fun WelcomeApp() {

    var message by remember {
        mutableStateOf("Welcome to Android Development!")
    }

    Surface(
        modifier = Modifier.fillMaxSize(),
        color = MaterialTheme.colorScheme.background
    ) {

        Column(
            modifier = Modifier
                .fillMaxSize()
                .padding(24.dp),
            verticalArrangement = Arrangement.Center,
            horizontalAlignment = Alignment.CenterHorizontally
        ) {

            Text(
                text = "My First Android App",
                style = MaterialTheme.typography.headlineMedium
            )

            Text(
                text = message,
                modifier = Modifier.padding(vertical = 20.dp)
            )

            Button(
                onClick = {
                    message = "Congratulations! Your app is working."
                }
            ) {
                Text("Get Started")
            }
        }
    }
}
Important: The imports must match your project’s available Compose and Material 3 dependencies. The standard Empty Activity Compose template provides the necessary setup.
Step 7: Understand How the Code Works
Let’s examine the important parts of the application.
1. MainActivity class
class MainActivity : ComponentActivity()This class creates the main activity for your Android application.
2. onCreate() function
override fun onCreate(savedInstanceState: Bundle?) {
    super.onCreate(savedInstanceState)
}
This method runs when Android creates the activity. We use it to initialize the application’s interface.
3. WelcomeApp() composable
@Composable
fun WelcomeApp() {
    // User interface
}
This function describes the content displayed on the screen.
4. Mutable state
var message by remember {
    mutableStateOf("Welcome to Android Development!")
}
This creates a state variable that stores the message.
When its value changes, Compose automatically updates the parts of the interface that depend on that state.
5. Column layout
Column(
    verticalArrangement = Arrangement.Center,
    horizontalAlignment = Alignment.CenterHorizontally
)
A Column arranges interface components vertically.
The alignment properties position the content in the center.
6. Button interaction
Button(
    onClick = {
        message = "Congratulations! Your app is working."
    }
) {
    Text("Get Started")
}
When the user presses the button, the message changes.
This demonstrates a fundamental principle of Android development: responding to user interactions and updating the interface.
Step 8: Run Your First Android Application
After writing the code, it is time to run your application.
Follow these steps:
-
Wait for Gradle synchronization to finish.
-
Select an available Android emulator from the device selector.
-
Click the Run button.
-
Wait for Android Studio to build the application.
-
Allow the emulator to launch.
-
Check that the welcome screen appears.
-
Press the Get Started button.
If everything works correctly, the welcome message will change.
Congratulations! You have created your first interactive Android application.
Step 9: Run the Application on a Physical Android Phone
You can also test your application on a real Android device.
First, enable Developer Options on your phone.
The general process is:
-
Open your phone’s Settings.
-
Find About Phone.
-
Locate the Build Number or corresponding software information.
-
Tap the Build Number repeatedly until Developer Options are enabled. The exact steps vary by manufacturer.
-
Open Developer Options.
-
Enable USB Debugging.
-
Connect your phone to your computer using a compatible USB cable.
-
Approve the debugging authorization prompt on your phone.
-
Select your phone in Android Studio.
-
Click Run.
Your application should install and launch on the connected device.
Only authorize USB debugging on computers you trust.
Step 10: Build an APK for Testing
An APK (Android Package Kit) is an application package that can be installed on compatible Android devices.
To create a debug APK:
-
Open the Build menu.
-
Find the Build Bundle(s) / APK(s) option.
-
Select Build APK(s).
-
Wait for the build process.
-
Check the build notification for the output location.
A debug APK is useful for personal testing. It is not the same as a properly signed release build intended for production distribution.
For Google Play distribution, Android App Bundles are commonly used.
14. Improve Your Android App with Additional Features
Once your first application works, you can extend it by adding more interactive components.
The following features provide useful learning opportunities.
Add a Text Input Field
Text fields allow users to enter information into an application.
For example, you can ask users to enter their names before displaying a personalized welcome message.
var name by remember {
    mutableStateOf("")
}

TextField(
    value = name,
    onValueChange = {
        name = it
    },
    label = {
        Text("Enter your name")
    }
)
This example demonstrates state management for user input. Add the appropriate TextField import and ensure the Material 3 components are available in your project.
Add a Counter Button
A counter application is another useful beginner project.
@Composable
fun CounterApp() {

    var count by remember {
        mutableIntStateOf(0)
    }

    Column(
        horizontalAlignment = Alignment.CenterHorizontally
    ) {

        Text(
            text = "Count: $count"
        )

        Button(
            onClick = {
                count++
            }
        ) {
            Text("Increase")
        }
    }
}
Every time the user presses Increase, the number increases by one.
This example helps beginners understand:
-
Variables.
-
State management.
-
Button events.
-
UI updates.
-
Kotlin expressions.
Add Navigation Between Screens
Most real-world applications contain multiple screens.
For example, a student application might have:
-
Home screen.
-
Student profile.
-
Course listing.
-
Settings screen.
Jetpack Compose supports navigation libraries that help developers manage screen transitions and application routes.
As your project grows, organize navigation separately rather than placing every screen inside one large composable function.
15. How to Design a Professional Android App Interface
Creating an application that works is only one part of development. You must also make sure that users can understand and navigate its interface.
A well-designed interface makes an application easier to use and improves the overall experience.
Follow Basic UI Design Principles
Consider these principles when designing your Android application:
Consistency: Use consistent fonts, colors, buttons, and spacing across screens.
Simplicity: Avoid adding unnecessary interface elements.
Readability: Use appropriate text sizes and sufficient contrast.
Accessibility: Make interactive elements easy to understand and operate.
Responsive layouts: Ensure that the interface adapts to different screen sizes.
Use Material Design Components
Material Design provides guidelines and components for creating consistent application interfaces.
Jetpack Compose Material 3 includes components such as:
-
Buttons.
-
Cards.
-
Text fields.
-
Navigation bars.
-
Dialogs.
-
Progress indicators.
-
Menus.
-
Floating action buttons.
Using standard components helps maintain consistency and reduces the amount of interface code you need to write.
Create a Simple Color Scheme
Choose a small collection of colors for your application.
For example:
| Interface element | Example color |
|---|---|
| Primary button | Blue |
| Background | White |
| Main heading | Dark grey |
| Secondary text | Grey |
| Success message | Green |
| Error message | Red |
Make sure text remains readable against its background. Do not rely on color alone to communicate important information.
16. How to Store Data in an Android Application
Most applications need to store information.
For example, a task management application must remember tasks, while a shopping application needs to manage products and order information.
Android applications can use different storage approaches depending on the type of information being stored.
Shared Preferences and DataStore
DataStore is a modern Android solution for storing small amounts of application preferences and settings.
Examples include:
-
Theme preferences.
-
Notification settings.
-
User interface preferences.
-
Small configuration values.
For new applications, DataStore is generally preferable to starting a new SharedPreferences implementation.
Room Database
Room is a database persistence library that provides an abstraction layer over SQLite.
It is useful for storing structured application data.
For example, a task management application might store:
| Task ID | Task name | Completed |
|---|---|---|
| 1 | Learn Kotlin | Yes |
| 2 | Build Android app | No |
| 3 | Test application | No |
Room provides important components:
-
Entities: Define database tables.
-
Data Access Objects (DAOs): Define database operations.
-
Database class: Provides access to the database.
Cloud Databases
Cloud databases are useful when information needs to be synchronized between devices or accessed through online services.
Firebase and other backend platforms can help developers manage:
-
User accounts.
-
Application records.
-
Messages.
-
Online transactions.
-
Cloud-synchronized information.
Choose local or cloud storage based on the application’s requirements. Do not store sensitive information in an insecure location.
17. Android App Testing and Debugging
Testing is one of the most important stages of application development.
An application that works correctly on your computer may still contain problems when installed on a physical smartphone.
Testing helps identify these issues before users encounter them.
Types of Android App Testing
| Testing type | Purpose |
|---|---|
| Unit testing | Checks individual functions and components |
| Integration testing | Checks how different application parts work together |
| UI testing | Checks screen interactions and interface behavior |
| Compatibility testing | Checks behavior across devices and Android versions |
| Performance testing | Evaluates responsiveness and resource consumption |
| Security testing | Identifies potential security weaknesses |
Use Android Studio Logcat
Logcat is a tool that displays application logs, warnings, and errors.
When an application crashes, Logcat can help you identify the problem.
For example, suppose your application crashes after a user presses a button.
You can:
-
Open Logcat in Android Studio.
-
Select the relevant application process.
-
Reproduce the problem.
-
Examine the error messages and stack trace.
-
Locate the affected code.
-
Fix the issue.
-
Run the application again.
Avoid ignoring warnings and errors simply because the application appears to work.
Test Different Android Devices
Android devices have different screen dimensions, hardware capabilities, and operating system versions.
Test your application with:
-
Small smartphones.
-
Large smartphones.
-
Tablets.
-
Different screen densities.
-
Supported Android versions.
-
Different orientations, if your application supports them.
A responsive interface should remain usable without clipping, overlapping, or hiding important content.
18. Common Mistakes Beginners Make When Building Android Apps
Learning Android development involves experimentation. Mistakes are normal, but understanding common problems can save considerable time.
Mistake 1: Writing Too Much Code at Once
Beginners sometimes attempt to build an entire application in one large file.
This makes the project difficult to understand and debug.
Solution: Divide the application into smaller composable functions and organize related functionality into appropriate files.
Mistake 2: Ignoring Kotlin Fundamentals
Trying to build an advanced application without understanding variables, functions, conditions, and collections creates unnecessary difficulties.
Solution: Practice basic Kotlin programming before moving into advanced Android features.
Mistake 3: Using Outdated Tutorials
Android development technologies change over time. Older tutorials may use outdated project templates, dependencies, or interface development approaches.
Solution: Learn modern Kotlin and Jetpack Compose workflows, and check that tutorial instructions match your installed Android Studio version.
Mistake 4: Ignoring Application Lifecycle
Android manages activities and other application components through lifecycle events.
Ignoring lifecycle behavior can cause problems with application state, background operations, and screen transitions.
Solution: Learn the activity lifecycle and use appropriate architecture and lifecycle-aware components.
Mistake 5: Not Testing on Real Devices
An emulator cannot always reproduce the exact behavior of physical hardware.
Solution: Test important features on at least one physical Android device before preparing a release.
Mistake 6: Hardcoding Everything
Putting all application text, colors, and configuration values directly into one file makes future changes difficult.
Solution: Use appropriate resources, themes, configuration files, and reusable components.
Mistake 7: Ignoring Security
Applications that handle personal information must protect user data.
Solution: Apply secure authentication, validate inputs, protect credentials, and configure network communication properly.
19. Android App Development Best Practices
Following good development practices helps you build applications that are easier to maintain, improve, and expand.
1. Use Clean Code
Write readable Kotlin code with meaningful variable and function names.
For example:
val studentName = "Alex"
val totalMarks = 450
Clear names make your code easier to understand than unclear abbreviations.
2. Use Reusable Composable Functions
Instead of repeating the same interface code, create reusable components.
For example:
@Composable
fun PrimaryActionButton(
    title: String,
    onClick: () -> Unit
) {
    Button(
        onClick = onClick
    ) {
        Text(title)
    }
}
You can reuse this component throughout your application by providing different text and click actions.
3. Follow Modern Android Architecture
As your application becomes more complex, separate interface code, business logic, and data management.
Common Android architecture concepts include:
-
UI layer.
-
Data layer.
-
ViewModel.
-
Repository.
-
Data sources.
-
Unidirectional data flow.
This separation makes projects easier to test and maintain.
4. Use Version Control
Git helps you track code changes and recover previous versions of your project.
Create commits after completing meaningful development tasks.
For example:
-
Initial Android project.
-
Added welcome screen.
-
Added button interaction.
-
Improved interface.
-
Fixed application errors.
This creates a useful development history.
5. Keep Dependencies Updated Carefully
Libraries and dependencies provide additional functionality, but outdated or incompatible versions can cause problems.
Review dependency updates and test your application after changing important libraries.
Avoid adding packages that do not provide genuine value.
20. Android App Security and Performance Optimization
A professional application should be secure, responsive, and reliable.
Even a simple beginner project can introduce good security and performance habits.
Android App Security Considerations
Protecting application information is especially important when your app handles user accounts, personal details, or financial transactions.
Follow these practices:
Use HTTPS: Encrypt communication between your application and backend services.
Secure authentication: Use appropriate authentication mechanisms and avoid storing passwords in plain text.
Protect API credentials: Never place private server credentials or secret keys directly in publicly distributed application code.
Validate user input: Check information received from forms and external services.
Configure permissions carefully: Request only the Android permissions that your application genuinely needs.
Secure database access: Apply appropriate access controls and security rules.
Protect sensitive information: Use appropriate platform security mechanisms for confidential data.
Improve Android App Performance
An application should respond quickly and avoid unnecessary resource consumption.
Consider the following techniques:
-
Avoid performing lengthy operations on the main UI thread.
-
Use Kotlin coroutines for appropriate asynchronous operations.
-
Optimize images and other media.
-
Avoid unnecessary recomposition in Compose interfaces.
-
Use efficient database queries.
-
Load large lists efficiently with lazy layouts.
-
Monitor memory usage.
-
Profile performance during development.
For example, a shopping application containing hundreds of products should not load every image and item into the interface simultaneously. Efficient list components can display content as users scroll.
21. Advanced Android Development Concepts to Learn Next
After successfully building your first application, you can begin exploring more advanced technologies.
Android Jetpack Libraries
Android Jetpack is a collection of libraries and tools designed to support modern Android development.
Some useful technologies include:
| Technology | Main purpose |
|---|---|
| ViewModel | Manages UI-related state |
| Room | Local database management |
| DataStore | Stores application preferences |
| Navigation | Manages application navigation |
| WorkManager | Schedules reliable background work |
| Lifecycle | Supports lifecycle-aware components |
| Paging | Loads large datasets efficiently |
You do not need to learn everything immediately. Choose libraries according to your application’s actual requirements.
API Integration
An API allows your application to communicate with another system.
For example, a weather application can request information from a weather service and display the response.
A typical workflow involves:
-
Sending an HTTP request.
-
Receiving a server response.
-
Checking the response status.
-
Processing the returned data.
-
Displaying the information.
-
Handling network errors.
Authentication
Authentication allows users to access personalized application features.
Common authentication approaches include:
-
Email and password.
-
Social sign-in.
-
Phone-based verification.
-
Secure token-based authentication.
Use established authentication services or properly designed backend systems rather than implementing insecure password handling yourself.
Push Notifications
Push notifications allow applications to send relevant updates to users.
For example:
-
New message alerts.
-
Order status updates.
-
Appointment reminders.
-
Educational notifications.
Notifications should be useful and respectful of user preferences.
Background Processing
Some operations need to continue without blocking the interface.
Examples include:
-
Uploading files.
-
Synchronizing information.
-
Processing large datasets.
-
Scheduling periodic tasks.
Android provides different approaches for background work. WorkManager is particularly useful for work that needs to execute reliably under appropriate system conditions.
22. How to Publish Your First Android App
After completing development and testing, you can prepare your application for distribution.
One common distribution option is the Google Play Store.
However, publishing requires more than simply uploading an APK file.
Step 1: Prepare a Release Build
Create a production-ready application build.
Review:
-
Application functionality.
-
Package name.
-
Version information.
-
Application icon.
-
Permissions.
-
Network security.
-
Release configuration.
Step 2: Generate a Signed App Bundle
For Google Play distribution, Android App Bundles (AAB) are commonly used.
Android Studio provides a signed bundle generation workflow.
You must configure signing correctly and protect your signing credentials.
Keep secure backups of the required signing information.
Step 3: Prepare Your Store Listing
Your application listing generally includes:
-
Application name.
-
Short description.
-
Full description.
-
Application icon.
-
Screenshots.
-
Category.
-
Contact information.
-
Privacy policy, where required.
Make sure the listing accurately describes the application’s features.
Step 4: Complete Required Policy Information
Google Play requires developers to comply with applicable developer policies.
Depending on your application, you may need to provide information about:
-
Data collection.
-
Data safety.
-
Application permissions.
-
Age suitability.
-
Content ratings.
-
Privacy practices.
-
Account deletion.
-
Other applicable requirements.
Review current publishing policies before submitting your application.
Step 5: Test Before Production Release
Use the available testing tracks to distribute your application to testers before making it publicly available.
Collect feedback, identify bugs, and resolve important problems.
Step 6: Submit Your Application
After completing the required setup, submit your application for review.
Approval and availability depend on the applicable platform requirements and review process.
Important: Google Play registration requirements, fees, verification procedures, and testing requirements can change. Check the current requirements before creating your developer account.
23. Your Next Android Development Learning Roadmap
Building one application is a good beginning, but becoming a capable Android developer requires continuous practice.
The following roadmap provides a practical learning sequence.
| Learning stage | Topics to study | Practical project |
|---|---|---|
| Beginner | Kotlin fundamentals | Calculator |
| Beginner | Compose basics | Welcome application |
| Beginner | State and events | Counter application |
| Intermediate | Navigation | Multi-screen application |
| Intermediate | Data storage | Notes application |
| Intermediate | APIs | Weather application |
| Intermediate | Authentication | Login application |
| Advanced | Architecture and ViewModel | Task management app |
| Advanced | Background work | Reminder application |
| Advanced | Testing and deployment | Production-ready project |
Beginner Projects to Practice
Once you understand the welcome application, try building these projects.
1. Calculator App
Practice buttons, arithmetic operations, input handling, and basic Kotlin logic.
2. Notes App
Learn how to create, edit, delete, and store information using a local database.
3. Weather App
Practice API integration, loading states, and displaying information from online services.
4. To-Do List App
Understand state management, lists, task completion, and data persistence.
These projects provide practical experience with concepts used in real Android applications.
24. 20 Frequently Asked Questions About How to Build Your First Android App Step by Step
1. How can I build my first Android app as a beginner?
You can build your first Android app by installing Android Studio, creating a new Empty Activity project, and writing Kotlin code. Start with a simple application containing text and buttons. Then learn how to manage application state, handle user interactions, test your project, and gradually introduce more advanced features.
2. Is Android app development difficult for beginners?
Android development can feel challenging initially because it involves programming, interface design, project configuration, and testing. However, beginners can learn these concepts gradually. Starting with Kotlin fundamentals and small Jetpack Compose projects makes the learning process easier and helps you build practical development skills.
3. Which programming language is best for Android app development?
Kotlin is the recommended programming language for modern native Android development. It offers concise syntax, null safety, and compatibility with Java libraries. Java is also supported and remains relevant for maintaining existing Android applications. Beginners starting a new native Android project should generally consider Kotlin.
4. Is Android Studio free to use?
Yes. Android Studio is available without a software licensing fee. It includes tools for programming, designing, debugging, testing, and building Android applications. You can use it to develop personal projects and professional applications without purchasing an Android Studio subscription. Other services used by your project may have separate costs.
5. Can I build an Android app without programming experience?
Yes, you can begin using visual development platforms such as MIT App Inventor and Thunkable. However, if you want to learn professional Android development, you should eventually study Kotlin, Android Studio, and Jetpack Compose. Programming knowledge provides greater control over application functionality and customization.
6. What is Jetpack Compose in Android development?
Jetpack Compose is a modern Android user interface toolkit that allows developers to create interfaces using Kotlin. It uses composable functions to describe application screens and their components. Developers can create buttons, text fields, layouts, navigation elements, and interactive interfaces without relying on traditional XML layouts for their Compose screens.
7. How long does it take to build a basic Android application?
A basic Android application may take a few hours or several days to develop, depending on its functionality and your programming experience. More advanced applications involving authentication, databases, APIs, and multiple screens require additional development and testing. Consistent practice is more important than rushing to complete a project.
8. Do I need an Android phone to develop an Android application?
No. You can use the Android Emulator included with Android Studio to run and test applications on your computer. However, testing on a physical Android phone is also recommended because it helps identify hardware-specific behavior, performance issues, and compatibility problems that may not appear in an emulator.
9. What is the difference between an APK and an AAB file?
An APK is an installable Android application package. An AAB, or Android App Bundle, is a publishing format that allows Google Play to generate optimized APKs for supported devices. APK files are useful for testing and certain distribution methods, while AAB is commonly used for Google Play releases.
10. How do I run an Android application in Android Studio?
First, create or open an Android project. Then select an available Android emulator or connect a physical device with USB debugging enabled. Click the Run button in Android Studio. The IDE will build the project, install the application on the selected device, and launch it.
11. Can I build an Android app using Kotlin without XML?
Yes. Jetpack Compose allows you to create Android user interfaces directly with Kotlin code. You can define layouts, buttons, text fields, images, and interactive components using composable functions. XML is still used in many existing Android projects, but it is not required for a new Compose-based interface.
12. What is the minimum computer requirement for Android Studio?
The requirements depend on the Android Studio release and whether you plan to run an emulator. You should check the official system requirements for your selected version. A compatible operating system, sufficient RAM, available storage, and a suitable processor are important for a smooth development experience.
13. How can I add buttons to my Android application?
In Jetpack Compose, you can use the Button composable to create interactive buttons. The onClick parameter defines what happens when the user presses the button. You can connect button actions to state variables, navigation events, calculations, and other application functionality.
14. How do I save data in an Android application?
Android applications can store information using different technologies. DataStore is useful for small preferences, while Room provides structured local database storage. Cloud platforms can synchronize information between devices. Choose a storage solution according to your application requirements and protect sensitive user information appropriately.
15. How can I connect my Android app to an API?
You can connect an Android application to an API using an HTTP networking library. The application sends a request to a server, receives a response, processes the returned information, and displays the relevant data. Kotlin coroutines can help manage asynchronous network operations without blocking the user interface.
16. What is the best way to test an Android application?
Use Android Studio’s emulator, physical Android devices, Logcat, and automated testing tools. Check the application’s navigation, buttons, data handling, screen compatibility, and performance. Unit tests can verify individual functions, while UI and integration tests help identify problems involving multiple application components.
17. How can I fix errors in Android Studio?
Start by checking the Build output and Logcat messages. Look for compilation errors, missing imports, dependency problems, and runtime exceptions. Read the error message carefully and identify the affected file or function. Correct the underlying issue, rebuild the application, and test the affected functionality again.
18. Is Kotlin better than Java for new Android applications?
Kotlin is generally the preferred choice for new native Android development because of its concise syntax, null safety, and modern language features. Java remains supported and is widely used in existing applications. The appropriate choice depends on your project, but Kotlin is a strong starting point for new developers.
19. How do I publish my Android application on Google Play?
Prepare a release build, configure application signing, generate an Android App Bundle, and create your application listing in Google Play Console. Complete the required policy and data safety information, conduct testing, and submit your application for review. Your application must meet the current publishing and developer account requirements.
20. What should I learn after building my first Android application?
After building your first app, study Kotlin programming, Jetpack Compose, application navigation, ViewModel, Room databases, APIs, authentication, and testing. You should also learn Git, application architecture, security, and performance optimization. Building increasingly complex projects will help you develop the practical skills needed for professional Android development.
25. Conclusion: Start Building Your First Android App Today
Learning how to build your first Android app step by step is an excellent way to begin your journey into mobile application development.
Although Android development includes several technical concepts, you do not need to master everything before starting your first project. By learning Kotlin, using Android Studio, and understanding Jetpack Compose, you can gradually develop applications that perform real tasks.
In this tutorial, we covered the essential development process, including:
-
Installing and configuring Android Studio.
-
Creating your first Android project.
-
Understanding the Android project structure.
-
Learning Kotlin and Jetpack Compose fundamentals.
-
Designing a simple application interface.
-
Writing code for buttons and user interactions.
-
Running applications using an emulator or physical device.
-
Creating APK files for testing.
-
Managing application data.
-
Testing and debugging Android applications.
-
Understanding security and performance.
-
Preparing applications for publishing.
The most important step is to continue practicing. Once you understand the basics, try developing a calculator, notes application, task manager, or weather application.
Every project will introduce new programming concepts and help you become more confident as a developer.
Android app development is a valuable technical skill for students, beginners, freelancers, and professionals who want to explore mobile software development.
At ToolMentors, our goal is to make technology education easier through practical tutorials, programming guides, development resources, and useful online tools.
Continue exploring, experiment with new ideas, and turn your first Android project into something more advanced.
Final Call to Action
Ready to improve your programming and development skills?
Visit ToolMentors to explore more educational guides, Android development tutorials, programming resources, web development lessons, and free online tools.
Learn step by step. Build practical projects. Develop your future with ToolMentors!
Internal linking recommendations for publication
The following are relevant internal links supplied in your content brief. The Android Kotlin and app development URLs should be checked on your live website before publication; I could not independently confirm all of them through the available search results.
| Suggested anchor text | URL |
|---|---|
| Android App Development with Kotlin | https://toolmentors.com/android-app-development-with-kotlin/ |
| Best Programming Languages for App Development | https://toolmentors.com/best-programming-languages-for-app-development/ |
| Best App Development Software Tools for Beginners | https://toolmentors.com/best-app-development-software-tools-for-beginners/ |
| UI/UX Design for Mobile Apps | https://toolmentors.com/ui-ux-design-for-mobile-apps/ |
Verified internal page: The Best App Development Software Tools for Beginners page is indexed on ToolMentors.