
Introduction
Have you ever wondered how iPhone applications are created and how you can build one yourself? From social networking and shopping applications to fitness trackers and educational platforms, iPhone apps play an important role in modern digital life. Behind these applications are programming languages, development frameworks, user interface designs, and software development tools.
If you are interested in learning iOS development, building your first iPhone application using SwiftUI is an excellent place to start.
SwiftUI is Apple’s modern user interface framework that allows developers to create applications for iPhone and other Apple platforms using Swift programming language. Instead of manually designing every interface element, developers can describe how their application should look and behave through readable code.
The good news is that you do not need years of programming experience to create a basic iPhone application. With a Mac computer, Xcode, and a basic understanding of Swift, you can start developing your first project.
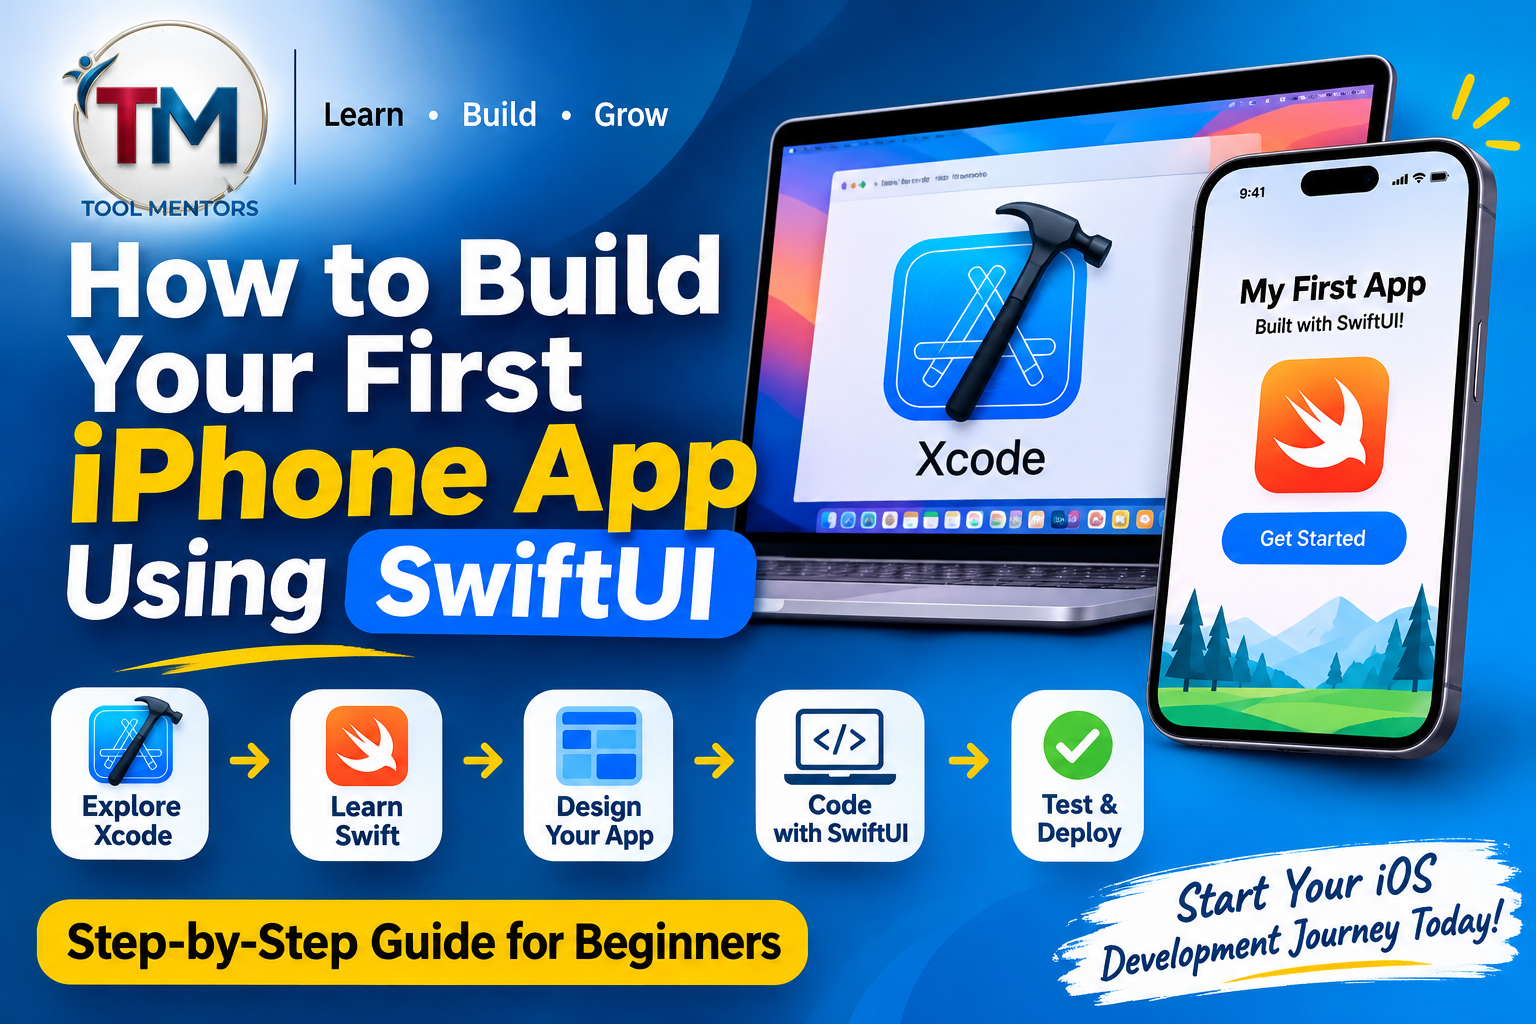
In this comprehensive ToolMentors guide, you will learn how to build your first iPhone app using SwiftUI, install the necessary development tools, understand essential programming concepts, design an interactive interface, write practical Swift code, test your application, and prepare it for publication.
Whether you are a student, beginner, freelancer, or aspiring iOS developer, this step-by-step tutorial will help you develop practical skills and understand the complete iPhone app development process.
What Is SwiftUI in iPhone App Development?
SwiftUI is a declarative user interface framework developed by Apple. It allows developers to build application interfaces using Swift code.
A declarative framework describes what the interface should display based on the current application state. SwiftUI then updates the interface when relevant data changes.
For example, imagine creating a shopping application with:
-
A product listing.
-
Product images and descriptions.
-
Add-to-cart buttons.
-
Shopping cart information.
-
Navigation between screens.
-
User account settings.
SwiftUI provides reusable components that help developers create these features without manually managing every interface update.
What Is the Difference Between Swift and SwiftUI?
Swift and SwiftUI are related technologies, but they serve different purposes.
| Feature | Swift | SwiftUI |
|---|---|---|
| Type | Programming language | User interface framework |
| Main purpose | Application logic | Interface development |
| Used for | Variables, functions, data, calculations | Buttons, text, layouts, navigation |
| Developed by | Apple | Apple |
| Main role | Controls application behaviour | Controls interface presentation |
For example, Swift can calculate the total price of products, while SwiftUI displays that total inside the application.
Both technologies work together to create modern iPhone applications.
Why Should Beginners Learn SwiftUI?
SwiftUI offers several advantages for people starting iOS development.
-
Readable syntax: Its declarative approach makes interface code easier to understand.
-
Reusable components: Developers can create views and reuse them throughout an application.
-
Live previews: Xcode allows developers to preview interface changes while working.
-
State management: Built-in property wrappers help connect application data with the interface.
-
Apple ecosystem support: SwiftUI supports development across multiple Apple platforms.
-
Modern development approach: It provides a contemporary alternative to building interfaces entirely with UIKit.
SwiftUI is particularly useful for beginners who want to understand how application interfaces and programming logic work together.
What Do You Need to Build Your First iPhone App?
Before starting development, you need the appropriate hardware, software, and basic programming knowledge.
1. A Mac Computer
Xcode is Apple’s primary development environment for creating native iOS applications. It runs on macOS.
You can use a MacBook, Mac mini, Mac Studio, or another compatible Mac computer.
Make sure your device has enough storage for Xcode, simulator runtimes, project files, and development resources.
2. Xcode
Essential iOS development environment
Xcode is Apple’s integrated development environment (IDE).
It provides the tools required to:
-
Write and edit Swift code.
-
Create SwiftUI interfaces.
-
Build iOS applications.
-
Run iPhone simulators.
-
Debug programming errors.
-
Manage project files.
-
Prepare applications for distribution.
You can install Xcode through the Mac App Store. The required version and supported operating system depend on your Mac.
3. Swift Programming Language
Swift is the programming language used to develop applications across Apple’s platforms.
Before building a complete application, learn these fundamental concepts:
-
Variables and constants.
-
Data types.
-
Conditional statements.
-
Loops.
-
Functions.
-
Arrays and dictionaries.
-
Structures and classes.
-
Optionals.
-
Closures.
You do not need to master every advanced Swift concept before creating your first project. Start with the basics and learn additional concepts as your application becomes more complex.
4. iPhone Simulator or Physical iPhone
Xcode includes Simulator, which allows developers to test applications on virtual Apple devices.
You can select different supported iPhone models and test how your interface behaves on different screen sizes.
A physical iPhone is also useful for checking real-world performance, touch interactions, permissions, and device-specific behaviour.
Understanding the Main Components of a SwiftUI Application
Before writing your first application, it is important to understand how a basic SwiftUI project is organised.
SwiftUI Views
A view represents an element of the application’s user interface.
Examples include:
-
Text labels.
-
Buttons.
-
Images.
-
Input fields.
-
Navigation screens.
-
Lists.
-
Cards.
SwiftUI views can be combined to create complete application screens.
Stacks and Layouts
SwiftUI provides three commonly used stack containers:
| Layout | Purpose |
|---|---|
| VStack | Arranges elements vertically |
| HStack | Arranges elements horizontally |
| ZStack | Layers elements on top of each other |
For example, a login screen might use a vertical stack to arrange a logo, email field, password field, and login button.
State Management
State represents information that can change while an application is running.
For example, a counter application needs to remember the current number. When the user presses a button, the number changes and the interface updates.
SwiftUI provides property wrappers such as @State, @Binding, and @Observable to help manage changing data.
Application Entry Point
Every SwiftUI application needs an entry point that identifies its main application structure.
A basic application uses the @main attribute and conforms to the App protocol.
This structure tells the system which interface should appear when the application launches.
Step-by-Step: How to Build Your First iPhone App Using SwiftUI
Now that you understand the essential technologies, it is time to create a working application.
For this tutorial, we will build a simple Daily Task Tracker.
The application will allow users to:
-
View a task heading.
-
Enter a new task.
-
Add tasks to a list.
-
Mark tasks as completed.
-
Delete tasks.
-
See how many tasks remain.
This project introduces practical SwiftUI concepts without requiring a complicated backend or database.
Step 1: Install and Open Xcode
First, install a compatible version of Xcode on your Mac.
Follow these steps:
-
Open the Mac App Store.
-
Search for Xcode.
-
Download and install the application.
-
Open Xcode.
-
Allow any required components to install.
-
Open the welcome screen.
Xcode provides the development environment needed to create, run, and debug your application.
Step 2: Create a New iOS Project
Create your first application project.
-
Open Xcode.
-
Select Create New Project.
-
Choose the iOS platform.
-
Select the App template.
-
Click Next.
Enter the project information:
| Setting | Example |
|---|---|
| Product Name | DailyTaskTracker |
| Team | Your development team, if applicable |
| Organization Identifier | com.example |
| Interface | SwiftUI |
| Language | Swift |
| Storage | None for this beginner project |
Choose a suitable folder to save your project and click Create.
Xcode will generate the initial application structure and create the files required to start development.
Step 3: Understand ContentView.swift
The ContentView.swift file is where you will create the main screen of your beginner application.
A new SwiftUI project generally includes a structure similar to this:
import SwiftUI

struct ContentView: View {
    var body: some View {
        Text("Hello, World!")
    }
}

#Preview {
    ContentView()
}
Let’s understand the important parts.
-
import SwiftUImakes the SwiftUI framework available. -
struct ContentViewdefines a reusable interface component. -
var bodydescribes the view’s content. -
Text()displays a text element. -
#Previewprovides a preview of the interface in Xcode.
This is the foundation of your first iPhone application.
Step 4: Design the Main Application Interface
Replace the default code inside ContentView.swift with the following example.
import SwiftUI

struct ContentView: View {

    @State private var taskName = ""

    @State private var tasks: [String] = []

    var body: some View {

        NavigationStack {

            VStack(spacing: 20) {

                Text("My Daily Tasks")
                    .font(.largeTitle)
                    .fontWeight(.bold)

                Text("Organise your day one task at a time.")
                    .foregroundStyle(.secondary)

                HStack {

                    TextField("Enter a new task", text: $taskName)
                        .textFieldStyle(.roundedBorder)

                    Button("Add") {
                        addTask()
                    }
                    .buttonStyle(.borderedProminent)
                    .disabled(taskName
                        .trimmingCharacters(in: .whitespacesAndNewlines)
                        .isEmpty)
                }

                List {
                    ForEach(tasks.indices, id: \.self) { index in

                        Text(tasks[index])
                    }
                    .onDelete { offsets in
                        tasks.remove(atOffsets: offsets)
                    }
                }
            }
            .padding()
            .navigationTitle("Task Tracker")
        }
    }

    private func addTask() {

        let newTask = taskName
            .trimmingCharacters(in: .whitespacesAndNewlines)

        guard !newTask.isEmpty else {
            return
        }

        tasks.append(newTask)

        taskName = ""
    }
}

#Preview {
    ContentView()
}
This example creates a basic task tracker with an input field, an Add button, and a list of tasks.
Step 5: Understand How the Code Works
Let’s examine the important programming concepts used in this application.
The @State property wrapper
@State private var taskName = ""This variable stores the text entered by the user.
The second state variable stores the tasks:
@State private var tasks: [String] = []The array can contain multiple task names.
When these state variables change, SwiftUI updates the relevant interface.
The TextField component
TextField("Enter a new task", text: $taskName)This creates an input field where users can enter a task.
The $ symbol provides a binding to the state variable, allowing the text field and application data to stay connected.
The Add button
Button("Add") {
    addTask()
}
When the user presses the button, the addTask() function executes.
The addTask function
private func addTask() {
    let newTask = taskName
        .trimmingCharacters(in: .whitespacesAndNewlines)

    guard !newTask.isEmpty else {
        return
    }

    tasks.append(newTask)
    taskName = ""
}
This function performs three important operations:
-
Removes unnecessary spaces.
-
Prevents empty tasks from being added.
-
Adds the task to the array and clears the input field.
The List component
List {
    ForEach(tasks.indices, id: \.self) { index in
        Text(tasks[index])
    }
    .onDelete { offsets in
        tasks.remove(atOffsets: offsets)
    }
}
The List displays the tasks, while ForEach generates a row for each item.
The onDelete modifier allows users to remove tasks using the list’s deletion interaction.
Step 6: Run Your First iPhone Application
After writing the code, you can run your application.
-
Select an available iPhone simulator from Xcode’s run destination menu.
-
Wait for the simulator to prepare.
-
Click the Run button.
-
Allow Xcode to build the application.
-
Wait for the application to launch.
You should now see your Daily Task Tracker interface.
Try entering a task and pressing Add. You should see the new item appear in the list.
You can also swipe a list item to delete it.
Congratulations! You have created your first basic iPhone application using SwiftUI.
Step 7: Improve the Application with Task Completion
The first version can add and delete tasks, but a useful task tracker should also allow users to mark completed tasks.
A better data model uses a structure instead of storing task names as simple strings.
For example:
struct TaskItem: Identifiable {
    let id = UUID()
    var title: String
    var isCompleted = false
}
This structure stores three important pieces of information:
-
A unique identifier.
-
The task title.
-
Its completion status.
You can now update your state variable:
@State private var tasks: [TaskItem] = []And display tasks with checkboxes:
List {
    ForEach($tasks) { $task in

        Toggle(
            task.title,
            isOn: $task.isCompleted
        )
    }
    .onDelete { offsets in
        tasks.remove(atOffsets: offsets)
    }
}
The toggle automatically updates the task’s completion state.
This demonstrates an important advantage of SwiftUI: interface elements can be connected directly to application data.
How to Design a Professional iPhone App Interface
Creating an application that works is only the first stage. A successful application should also provide a comfortable and intuitive user experience.
Follow iOS Design Principles
Consider the following design principles:
-
Keep navigation simple.
-
Use readable typography.
-
Maintain consistent spacing.
-
Make buttons easy to identify.
-
Avoid overcrowding screens.
-
Provide clear feedback after user actions.
-
Support both light and dark appearances where appropriate.
For a deeper understanding of interface design, explore ToolMentors’ guide to UI/UX Design for Mobile Apps.
Use SwiftUI Modifiers
Modifiers change how SwiftUI views look and behave.
For example:
Text("Welcome to My App")
    .font(.title)
    .fontWeight(.bold)
    .foregroundStyle(.blue)
    .padding()
    .background(.gray.opacity(0.1))
    .cornerRadius(12)
This example changes the text’s font, weight, colour, spacing, and background.
You can combine multiple modifiers to create attractive application components.
Create Reusable SwiftUI Components
Professional applications often contain repeated elements such as buttons, product cards, and navigation sections.
Instead of writing the same interface code repeatedly, create reusable views.
struct PrimaryButton: View {

    let title: String
    let action: () -> Void

    var body: some View {

        Button(action: action) {
            Text(title)
                .fontWeight(.semibold)
                .frame(maxWidth: .infinity)
                .padding()
                .background(.blue)
                .foregroundStyle(.white)
                .clipShape(RoundedRectangle(cornerRadius: 12))
        }
    }
}
You can reuse this component throughout your application by passing a title and an action.
This approach improves code organisation and makes future updates easier.
Important SwiftUI Tools and Technologies
Developers use different tools and frameworks depending on the application’s requirements.
| Tool or technology | Main purpose |
|---|---|
| Swift | Programming language |
| SwiftUI | User interface development |
| Xcode | Development environment |
| Simulator | Virtual device testing |
| SwiftData | Data persistence |
| Core Data | Object graph and persistence framework |
| URLSession | Network communication |
| XCTest | Testing framework |
| Instruments | Performance analysis |
SwiftData for Local Data Storage
The first task tracker stores information in temporary application state. Its tasks disappear when the application is restarted.
For a more useful application, you need persistent storage.
SwiftData provides a way to store and manage model data across application launches.
For example, a task tracker could store:
-
Task names.
-
Completion status.
-
Creation dates.
-
Categories.
-
Due dates.
Persistent storage is important for applications that need to remember user information.
URLSession for API Integration
Many applications need information from online services.
For example, a weather application may retrieve temperature information from a server.
Swift provides URLSession for making network requests.
A simple asynchronous request might look like this:
func fetchData() async throws -> Data {

    let url = URL(
        string: "https://example.com/api/data"
    )!

    let (data, _) = try await URLSession.shared.data(
        from: url
    )

    return data
}
This is an illustrative example. A production application should use its actual API endpoint, validate responses, handle HTTP errors, and avoid force-unwrapping URLs.
Choosing the Right Development Tools
If you are new to application development, understanding available software can make your learning journey easier.
Read ToolMentors’ guide to Best App Development Software and Tools for Beginners to explore different development environments and technologies.
SwiftUI vs UIKit: Which Should Beginners Choose?
SwiftUI and UIKit are both important technologies in iOS development.
However, their development approaches are different.
| Feature | SwiftUI | UIKit |
|---|---|---|
| Development approach | Declarative | Imperative |
| Interface creation | Swift code | Views and view controllers |
| Learning experience | Often simpler for new projects | Requires understanding UIKit concepts |
| Interface updates | State-driven | Explicitly managed |
| Modern projects | Excellent choice | Still widely used |
| Integration | Can work with UIKit | Can host SwiftUI views |
When Should You Choose SwiftUI?
SwiftUI is a strong choice when:
-
You are learning iOS development.
-
You are creating a new application.
-
You want reusable interface components.
-
You prefer declarative interface development.
-
You want to support multiple Apple platforms.
When Should You Choose UIKit?
UIKit can be appropriate when:
-
Maintaining an existing UIKit application.
-
Using UIKit-specific functionality.
-
Working with older projects.
-
Integrating with existing libraries and components.
-
Building interfaces that require specialised UIKit behaviour.
You can also combine SwiftUI and UIKit in the same project when necessary.
Common Mistakes Beginners Make When Building iPhone Apps
Learning SwiftUI involves experimentation, and beginners often encounter similar problems.
Understanding these mistakes can save time and improve your development skills.
1. Trying to Build a Complicated App First
Beginners sometimes start with ambitious projects such as social networks, shopping platforms, or financial applications.
These projects require multiple advanced features.
Solution: Begin with smaller projects such as calculators, task trackers, note-taking applications, or simple expense managers.
2. Ignoring Swift Programming Fundamentals
SwiftUI simplifies interface development, but it does not eliminate the need to understand programming.
Solution: Learn variables, functions, structures, arrays, optionals, and conditional statements before moving towards complex features.
3. Using Too Many Interface Elements
Adding too many buttons, colours, and animations can make an application confusing.
Solution: Keep the interface simple and focus on the most important user actions.
4. Not Testing on Different Screen Sizes
An interface that looks good on one simulator may behave differently on another device.
Solution: Test different iPhone sizes, orientations where supported, and accessibility text settings.
5. Ignoring Error Handling
Applications can encounter network failures, missing information, invalid input, and storage problems.
Solution: Validate user input and provide useful error messages instead of allowing failures to produce confusing experiences.
6. Storing Sensitive Information Insecurely
Never store passwords, authentication secrets, or sensitive personal information in ordinary application preferences.
Solution: Use appropriate secure storage, such as Keychain, and follow platform security practices.
Best Practices for SwiftUI App Development
Good development habits make applications easier to maintain, test, and improve.
Organise Your Project Files
As your application grows, avoid placing every feature inside one large Swift file.
Consider organising your project into folders such as:
DailyTaskTracker/
│
├── App/
│   └── DailyTaskTrackerApp.swift
│
├── Views/
│   ├── ContentView.swift
│   └── TaskRowView.swift
│
├── Models/
│   └── TaskItem.swift
│
├── Services/
│   └── TaskService.swift
│
├── Resources/
│
└── Tests/
This structure separates the interface, data models, and application services.
Use Meaningful Variable Names
Prefer:
var completedTasksCount = 5Instead of:
var x = 5Meaningful names make code easier to understand and maintain.
Keep Views Small
Break large screens into smaller reusable components.
This makes individual interface sections easier to test and update.
Use Accessibility Features
Make your application usable by people with different accessibility needs.
Important practices include:
-
Provide meaningful accessibility labels.
-
Maintain sufficient colour contrast.
-
Support Dynamic Type.
-
Use logical navigation order.
-
Avoid communicating information through colour alone.
-
Test VoiceOver interactions.
Use Version Control
Version control helps developers track changes, recover previous code, and collaborate with others.
Git is commonly used for this purpose.
For beginners, creating regular commits is a useful habit even when working alone.
Security and Performance Considerations
A professional iPhone application should be reliable, secure, and responsive.
Protect User Information
Consider these security practices:
-
Store sensitive credentials using appropriate secure storage.
-
Use HTTPS for network communication.
-
Validate information received from APIs.
-
Request only the permissions your application needs.
-
Avoid exposing private information in logs.
-
Keep third-party dependencies updated.
-
Apply suitable authentication and authorisation controls.
Improve Application Performance
An application that responds slowly can frustrate users.
To improve performance:
-
Avoid unnecessary view updates.
-
Use efficient data structures.
-
Load large images appropriately.
-
Perform lengthy operations asynchronously.
-
Avoid blocking the main thread.
-
Profile performance using Instruments.
-
Monitor memory consumption.
Performance testing should be part of development rather than something postponed until publication.
How to Test and Debug Your First iPhone App
Testing helps identify errors before an application reaches users.
Use the iPhone Simulator
The Simulator allows developers to test applications without requiring a physical iPhone for every development task.
You can check:
-
Screen layouts.
-
Button interactions.
-
Navigation.
-
Input fields.
-
Application behaviour.
-
Different supported device configurations.
Test on a Physical iPhone
A physical device can reveal issues that may not appear in a simulator.
For example:
-
Actual device performance.
-
Touch responsiveness.
-
Permission behaviour.
-
Camera and location access.
-
Device-specific integration.
-
Network connectivity.
Use Xcode Debugging Tools
Xcode provides a debugger that helps developers identify and investigate programming errors.
You can:
-
Set breakpoints.
-
Inspect variable values.
-
Follow application execution.
-
Review console messages.
-
Identify runtime issues.
Create Basic Unit Tests
Unit tests help verify individual pieces of application logic.
For example, the task-adding functionality can be tested to ensure that empty task names are rejected and valid task names are accepted.
Testing is especially important as your application becomes more complicated.
How to Publish Your iPhone App on the App Store
Once your application is complete, tested, and ready for distribution, you can prepare it for publication
The publishing process involves several important steps.
Step 1: Prepare Your Application
Before submission:
-
Remove unnecessary development code.
-
Check for crashes and major bugs.
-
Test important application features.
-
Add an appropriate application icon.
-
Prepare screenshots.
-
Review privacy requirements.
-
Configure the correct application identifier.
Step 2: Configure Signing and Capabilities
Xcode provides signing and capability settings for managing application identity and supported Apple services.
Depending on your application, you may need to configure capabilities such as:
-
Push notifications.
-
iCloud.
-
Associated domains.
-
In-app purchases.
-
Background processing.
Only enable the capabilities your application actually requires.
Step 3: Prepare Your App Store Listing
You will need information such as:
-
Application name.
-
Description.
-
Screenshots.
-
App category.
-
Age rating information.
-
Privacy details.
-
Support information.
Make sure all information accurately represents your application.
Step 4: Upload Your Application
Use Xcode’s distribution workflow to archive and upload your application for review.
App Store distribution requires the appropriate Apple account, signing configuration, and compliance with applicable requirements.
Step 5: Submit for Review
Before submitting, check that the application works correctly and follows the applicable review guidelines.
Apple reviews submissions before making them available through the App Store.
Approval is not guaranteed, so be prepared to address any issues identified during the review process.
Advanced SwiftUI Concepts to Learn After Your First App
Once you have built a working beginner application, you can gradually explore more advanced development techniques.
1. MVVM Architecture
Model-View-ViewModel (MVVM) is an architectural pattern that separates application data, presentation, and interface responsibilities.
-
Model manages application data.
-
View displays the interface.
-
ViewModel manages presentation-related logic.
This approach can improve organisation in larger applications.
2. Asynchronous Programming
Modern applications frequently communicate with servers and perform tasks that take time.
Swift concurrency provides tools such as async, await, and tasks to manage asynchronous operations.
Understanding concurrency helps you create responsive interfaces.
3. Navigation and Deep Linking
As your application grows, you may need multiple screens and more advanced navigation.
SwiftUI provides navigation tools that help users move between different parts of an application.
Deep linking can also allow users to open specific application screens through supported URLs.
4. Database Integration
Learn how to use SwiftData or other suitable storage technologies to save user information.
This is important for applications such as:
-
Expense trackers.
-
Note-taking applications.
-
Fitness applications.
-
Educational platforms.
-
Productivity tools.
5. API Integration and Authentication
Professional applications often connect to backend services.
Learn about:
-
REST APIs.
-
JSON data.
-
Authentication.
-
Secure network requests.
-
Error handling.
-
Data synchronisation.
These concepts help transform simple applications into complete software products.
Practical iPhone App Ideas for SwiftUI Beginners
After completing the Daily Task Tracker, try building another application to improve your programming skills.
| Project idea | Main features | Skills learned |
|---|---|---|
| Calculator App | Numbers and calculations | State and functions |
| Notes App | Create and save notes | Data management |
| Expense Tracker | Income and expenses | Data models and lists |
| Weather App | Display weather information | API integration |
| Habit Tracker | Daily progress | State and persistence |
| Quiz App | Questions and scoring | Conditional logic |
| Shopping List | Products and quantities | Lists and navigation |
Start with one project, complete its main features, and gradually introduce more advanced functionality.
This practical approach will help you understand how individual programming concepts work together in real applications.
Relevant ToolMentors Internal Links
The following five published ToolMentors resources are relevant to this article and can help readers continue learning:
-
What Is App Development? A Complete Beginner’s Guide – Understand the complete application development process.
-
Best Programming Languages for App Development – Compare programming languages used for mobile applications.
-
iOS App Development with Swift – Learn the fundamentals of developing applications for Apple devices.
-
Best App Development Software and Tools for Beginners – Explore useful development environments and software.
-
UI/UX Design for Mobile Apps – Understand interface design and user experience.
20 Frequently Asked Questions About How to Build Your First iPhone App Using SwiftUI
1. How can I build my first iPhone app using SwiftUI?
To build your first iPhone app using SwiftUI, install Xcode on a compatible Mac, create a new iOS application project, and select SwiftUI as the interface technology. Start by designing a simple screen using components such as Text, Button, VStack, and TextField. Add application functionality using Swift and test your project in the iPhone Simulator.
2. Is SwiftUI suitable for beginners?
Yes. SwiftUI is suitable for beginners because it uses a declarative approach to interface development. Developers describe how the interface should appear, and SwiftUI manages many interface updates automatically. Beginners can start with simple projects such as calculators, task trackers, and note-taking applications while learning Swift programming fundamentals.
3. Do I need to learn Swift before learning SwiftUI?
Learning basic Swift before starting SwiftUI is recommended. Understanding variables, constants, functions, arrays, structures, and conditional statements makes interface development easier. However, you can learn Swift and SwiftUI together by creating small applications and practising programming concepts through real examples.
4. Can I develop an iPhone app without owning an iPhone?
Yes. You can develop and test many iPhone applications using the Simulator included with Xcode. It allows you to run your application on virtual iPhone devices. However, testing on a physical iPhone is recommended before publication because certain hardware features and real-device behaviours cannot be fully evaluated through simulation.
5. Is Xcode free for iOS app development?
Xcode is available without a purchase through the Mac App Store, although a compatible Mac and sufficient storage are required. You can use it to write Swift code, design SwiftUI interfaces, and test applications. Certain distribution and developer services require additional account arrangements or membership.
6. What programming language is used with SwiftUI?
SwiftUI uses the Swift programming language. Swift handles application logic, calculations, data processing, and other programming tasks, while SwiftUI provides the tools for creating application interfaces. Together, they allow developers to build native applications for Apple’s platforms.
7. What is the difference between SwiftUI and UIKit?
SwiftUI uses a declarative approach in which developers describe the desired interface, while UIKit uses a more traditional imperative approach involving views and view controllers. SwiftUI is an excellent option for many new projects, whereas UIKit remains useful for existing applications and specialised interface requirements.
8. How long does it take to build a basic iPhone app?
The development time depends on the application’s complexity and your programming experience. A basic calculator or task tracker may be completed in a relatively short learning project. Applications involving authentication, online databases, payment systems, and advanced features require considerably more planning, development, and testing.
9. Can I build an iPhone app without coding?
Yes. No-code and low-code platforms allow users to create certain applications through visual interfaces and prebuilt components. However, learning Swift and SwiftUI provides greater control over application functionality, interface design, performance, and integration with native Apple technologies.
10. What is the purpose of @State in SwiftUI?
@State is a SwiftUI property wrapper used to manage values that can change during a view’s lifetime. For example, it can store a counter value, text entered into an input field, or a list of tasks. When the state changes, SwiftUI updates the relevant interface automatically.
11. How do I connect multiple screens in a SwiftUI application?
You can use NavigationStack and NavigationLink to create navigation between different application screens. Each screen can be represented by a separate SwiftUI view. This approach helps organise larger applications and makes it easier for users to move between features.
12. Can SwiftUI applications store information permanently?
Yes. SwiftUI applications can use persistence technologies such as SwiftData and Core Data to store information between application launches. For example, a notes application can save written notes, while a task tracker can remember completed tasks and their descriptions.
13. How can I test my SwiftUI application?
You can test your application using Xcode Previews, the iPhone Simulator, and physical Apple devices. Xcode also provides debugging and testing tools that help identify programming errors. Test important interactions, different screen sizes, accessibility settings, and application performance before distribution.
14. Can I publish a SwiftUI application on the Apple App Store?
Yes. SwiftUI applications can be distributed through the Apple App Store. You need to configure your project, prepare application screenshots and descriptions, complete the required privacy information, and submit a properly signed application through Apple’s distribution workflow. Your submission must meet the applicable review requirements.
15. How much does it cost to publish an iPhone application?
The development cost depends on whether you build the application yourself or hire developers. Xcode is available without a purchase, but publishing and certain developer services involve Apple’s account and membership requirements. Additional costs may include design services, backend hosting, databases, APIs, and third-party services.
16. How do I add buttons and input fields in SwiftUI?
SwiftUI provides built-in components such as Button and TextField. A button executes an action when pressed, while a text field accepts user input. You can connect these components to application state using property wrappers and bindings to create interactive application screens.
17. What is MVVM architecture in SwiftUI?
MVVM stands for Model-View-ViewModel. It is an architectural pattern that separates data, interface presentation, and application-related logic. The Model represents data, the View displays the interface, and the ViewModel manages presentation logic. This structure can make larger SwiftUI applications easier to maintain and test.
18. How can I improve the performance of my SwiftUI application?
Improve performance by avoiding unnecessary view updates, managing application state carefully, loading images efficiently, and performing lengthy operations asynchronously. Use Xcode’s debugging and profiling tools to identify performance problems. Regular testing on physical devices can also help reveal issues that may not appear in the Simulator.
19. Is SwiftUI better than Flutter for iPhone app development?
The best choice depends on your project. SwiftUI is designed for Apple’s platforms and is particularly suitable for native iOS development. Flutter supports cross-platform application development using Dart and can share substantial amounts of code between supported platforms. Choose SwiftUI when native Apple ecosystem development is your priority.
20. What should I learn after building my first SwiftUI application?
After completing your first application, learn advanced Swift programming, navigation, data persistence, API integration, authentication, asynchronous programming, and software testing. You should also explore MVVM architecture, accessibility, and performance optimisation. Building progressively more advanced projects will help you develop the practical skills required for professional iOS development.
Conclusion
Learning how to build your first iPhone app using SwiftUI is an excellent starting point for anyone interested in mobile application development. With Swift, SwiftUI, and Xcode, beginners can learn how to transform simple ideas into functional applications for Apple devices.
Throughout this guide, we explored the essential tools, programming concepts, project setup, interface design, practical coding examples, application testing, and publishing process.
The most important lesson is to start with a manageable project and gradually improve it.
Your learning journey should follow a practical progression:
-
Learn the fundamentals of Swift programming.
-
Understand SwiftUI views, layouts, and modifiers.
-
Create a simple iOS application using Xcode.
-
Practise managing application state.
-
Learn navigation and data persistence.
-
Integrate APIs and external services.
-
Improve security, accessibility, and performance.
-
Test your application on simulators and physical devices.
-
Learn how to prepare and distribute applications.
Remember that becoming an iOS developer requires consistent practice, problem-solving, and experimentation. Your first application does not need to be perfect. Focus on understanding how different components work together and improving your projects with every new feature.
As you gain experience, you can move from simple applications towards more advanced projects such as educational platforms, productivity tools, shopping applications, and business software.
At ToolMentors, our goal is to make technology education easier and more practical for students, beginners, developers, and professionals.
Final Call to Action
Ready to develop your programming and app development skills?
Explore ToolMentors for educational tutorials, practical coding guides, free online tools, and helpful resources covering Swift, Kotlin, Python, HTML5, web development, and mobile application development.
Start learning today, practise your skills, and turn your app ideas into real projects!