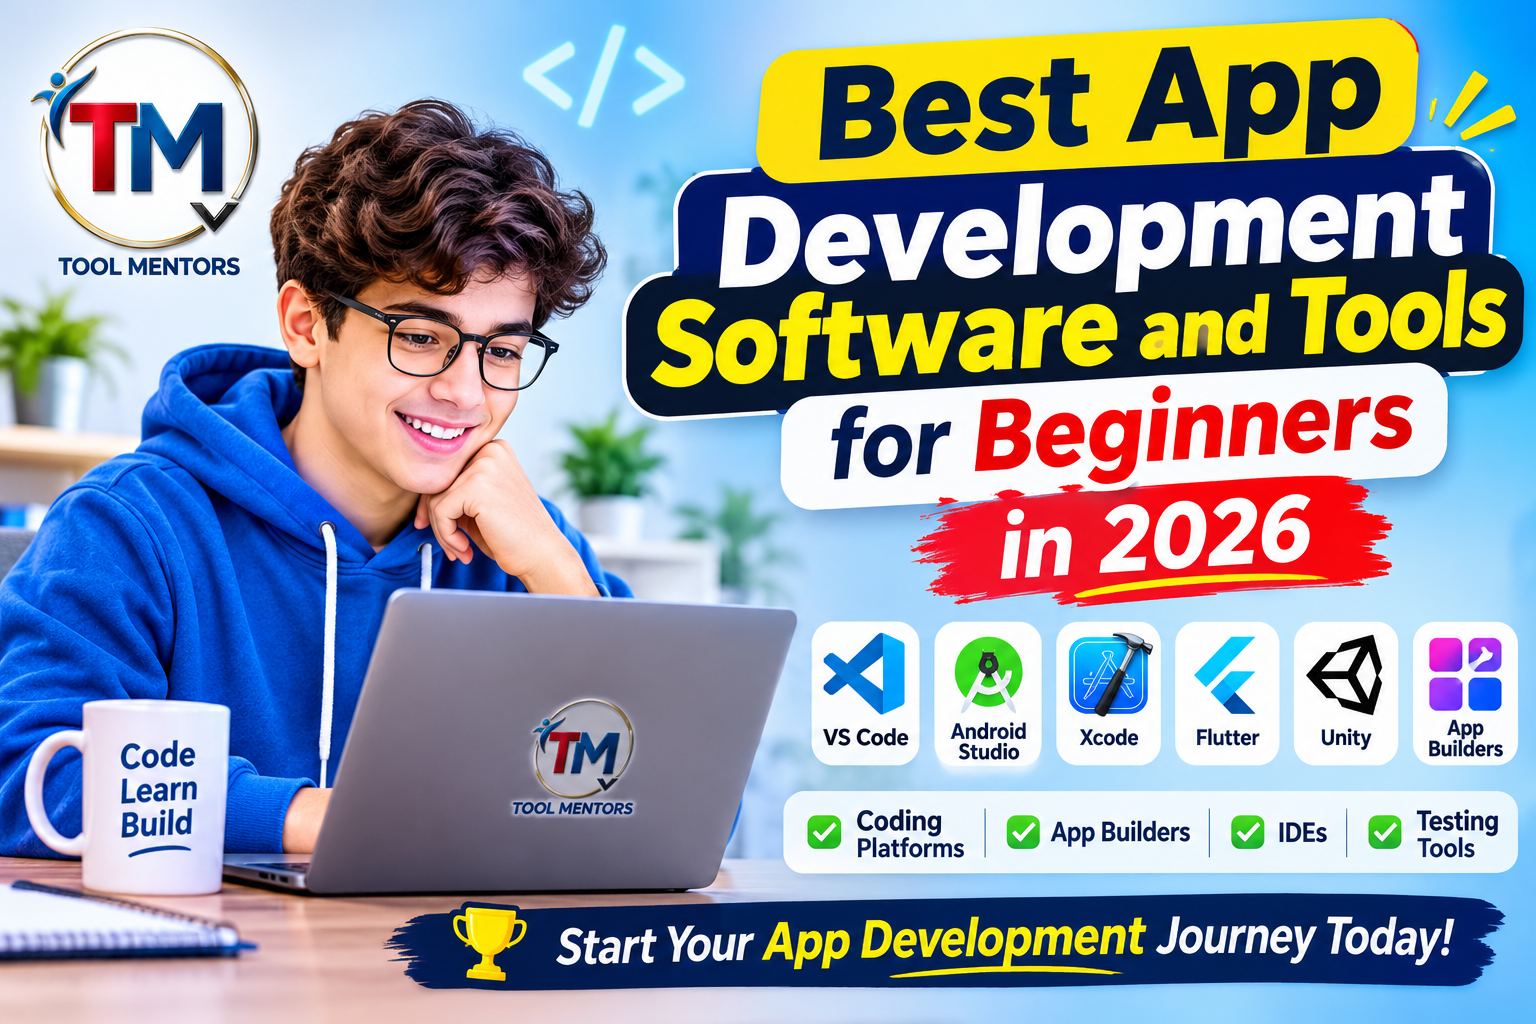
Best App Development Software and Tools for Beginners in 2026
Building a mobile application is no longer limited to experienced software engineers or professional development teams. In 2026, students, freelancers, entrepreneurs, and beginners can use a wide range of app development software to turn their ideas into functional Android and iOS applications.
However, choosing the right software can be challenging. Some platforms require programming knowledge, while others allow users to create applications through visual editors and drag-and-drop components. Certain tools focus on Android development, whereas others support iOS or cross-platform development.
The best choice depends on your technical experience, project requirements, budget, and long-term development goals.
Whether you want to create your first mobile application, develop an app for a business, or learn professional programming skills, understanding the available tools will help you make a better decision.
In this guide, we will explore the best app development software and tools for beginners in 2026, compare their features, explain their advantages and disadvantages, and show you how to select the right development environment for your first project.
What Is App Development Software?
App development software refers to programs, platforms, frameworks, and development environments that help developers design, build, test, debug, and publish applications.
These tools simplify different stages of the development process. Some provide a complete coding environment, while others offer visual interfaces that reduce the amount of programming required.
For example, a developer creating an Android application might use Android Studio to write code, an emulator to test the application, and Firebase to manage authentication and cloud-based data.
Similarly, someone developing a cross-platform application might use Flutter or React Native to create an application that works on multiple operating systems.
How Does App Development Software Work?
Most app development tools support several important development activities:
-
Project creation: Set up a new application and configure its basic structure.
-
User interface design: Create screens, buttons, menus, forms, and navigation elements.
-
Programming: Write the code responsible for application functionality.
-
Database integration: Store and retrieve application information.
-
Testing: Identify errors and check application performance.
-
Debugging: Find and resolve programming problems.
-
Deployment: Prepare the application for distribution through supported platforms.
Not every development tool provides all these features. Developers frequently combine multiple tools to complete a project.
Different Types of App Development Tools
Before selecting software, it is important to understand the main categories.
| Tool Category | Main Purpose | Example |
|---|---|---|
| IDE software | Writing, managing, and debugging code | Android Studio |
| Code editors | Editing application source code | Visual Studio Code |
| No-code platforms | Building apps with visual interfaces | Glide |
| Cross-platform frameworks | Developing apps for multiple operating systems | Flutter |
| UI design tools | Designing application screens | Figma |
| Backend platforms | Managing authentication and application data | Firebase |
| Testing tools | Checking functionality and performance | Appium |
| Version control | Managing code changes | Git |
Understanding these categories will help you avoid choosing software that does not meet your actual development requirements.
12 Best App Development Software and Tools for Beginners in 2026
The following tools cover different development approaches, including native Android development, iOS programming, cross-platform applications, visual app building, UI design, and backend management.
Some are suitable for complete beginners, while others are better for learners who want to develop professional programming skills.
1. Android Studio – Best for Android App Development
Best for: Beginners learning native Android development.
Programming languages: Kotlin and Java.
Operating system: Windows, macOS, Linux, and ChromeOS support varies by release.
Free development software
Android Studio is the official integrated development environment (IDE) for Android application development.
It provides a complete workspace where developers can write code, design application interfaces, manage project files, run emulators, and identify programming errors.
For beginners interested in building Android applications, Android Studio is an excellent starting point.
Key Features:
-
Code editor with intelligent suggestions.
-
Visual layout and interface development tools.
-
Android device emulator.
-
Kotlin and Java support.
-
Debugging and performance profiling.
-
Build configuration and application packaging.
-
Integration with Android development libraries.
Advantages:
-
Free to use.
-
Designed specifically for Android development.
-
Provides professional development features.
-
Supports modern Android programming workflows.
-
Includes useful testing and debugging functionality.
Disadvantages:
-
Can consume significant computer resources.
-
Beginners need time to understand its interface.
-
Requires programming knowledge for custom applications.
Practical Example:
Suppose you want to create a student attendance application. You can use Android Studio to develop login screens, attendance forms, student profiles, and database connections.
For someone who wants to become an Android developer, learning Android Studio alongside Kotlin provides a strong technical foundation.
2. Visual Studio Code – Best Lightweight Code Editor
Best for: Beginners learning programming and cross-platform development.
Programming languages: JavaScript, TypeScript, Dart, Python, Java, and many others.
Free and open-source
Visual Studio Code is a popular source code editor that supports application development through extensions.
Unlike a complete mobile development IDE, VS Code provides a lightweight environment that developers can customize according to their projects.
It is particularly useful for beginners learning JavaScript, Flutter, React Native, and other programming technologies.
Key Features:
-
Intelligent code completion.
-
Syntax highlighting.
-
Integrated terminal.
-
Extensions for different programming languages.
-
Git integration.
-
Debugging support.
-
Customizable development environment.
Advantages:
-
Free and beginner-friendly.
-
Lightweight compared with many full IDEs.
-
Supports numerous programming languages.
-
Large extension ecosystem.
-
Suitable for web and mobile development workflows.
Disadvantages:
-
Some features require additional extensions.
-
Android and iOS build environments need separate configuration.
-
Beginners may install unnecessary extensions.
Practical Example:
If you want to build a mobile application using React Native, you can write JavaScript or TypeScript code in VS Code and use the appropriate development tools to run and test your project.
It is also useful for learning programming fundamentals before moving into more specialized development environments.
3. Flutter – Best for Cross-Platform Mobile Applications
Best for: Beginners who want to develop Android and iOS applications.
Programming language: Dart.
Free and open-source framework
Flutter is an open-source UI framework that allows developers to create applications for multiple platforms using a shared codebase.
Instead of building completely separate applications for Android and iOS, developers can use Flutter to develop much of the application functionality and interface in one project.
Flutter is particularly useful for startups, freelancers, and developers who want to build applications without maintaining two completely separate codebases.
Key Features:
-
Cross-platform development.
-
Hot reload for faster development.
-
Customizable interface components.
-
Dart programming language.
-
Rich UI development capabilities.
-
Support for animations.
-
Integration with backend services.
Advantages:
-
One codebase can support multiple platforms.
-
Free and open-source.
-
Suitable for visually attractive applications.
-
Provides extensive interface customization.
-
Strong developer ecosystem.
Disadvantages:
-
Requires learning Dart.
-
Some platform-specific features require native integrations.
-
Complex applications may need additional architecture planning.
Practical Example:
Imagine developing a food delivery application with restaurant listings, menus, shopping carts, and order tracking.
Flutter allows you to build the main application interface and shared functionality for Android and iOS using a common development project.
For beginners interested in cross-platform programming, Flutter is one of the strongest options to explore.
4. Xcode – Best for iOS App Development
Best for: Developers interested in iPhone and iPad applications.
Programming language: Swift, with support for Objective-C projects.
Operating system: macOS.
Free IDE for Mac users
Xcode is Apple’s official development environment for creating applications for iOS and other Apple platforms.
It includes a code editor, interface design tools, simulators, debugging features, and application build tools.
Beginners interested in developing applications specifically for iPhones should consider learning Xcode and Swift.
Key Features:
-
Swift programming support.
-
Interface development tools.
-
iOS simulator.
-
Code debugging.
-
Application performance analysis.
-
Project management.
-
App build and distribution workflows.
Advantages:
-
Official Apple development environment.
-
Provides tools for native iOS development.
-
Supports modern Swift development.
-
Includes application testing features.
Disadvantages:
-
Requires a Mac for normal development.
-
The development environment can feel complicated initially.
-
Learning Swift requires programming practice.
Practical Example:
You can use Xcode to build a personal finance application for iPhone users. The application might include expense tracking, account screens, transaction history, and notifications.
Xcode is the appropriate starting point when your main goal is native Apple application development.
5. Thunkable – Best for Beginners Without Coding Experience
Best for: Students and beginners who want to build applications visually.
Programming requirement: Minimal coding.
Free entry-level access with paid options
Thunkable is a visual app development platform that allows users to build mobile applications without writing traditional programming code for every feature.
Its drag-and-drop interface helps beginners arrange application components and connect them through visual logic blocks.
This makes it useful for educational projects, prototypes, and simple business applications.
Key Features:
-
Drag-and-drop interface builder.
-
Visual programming blocks.
-
Application preview.
-
Device feature integrations.
-
Data connections.
-
Mobile application publishing options.
Advantages:
-
Suitable for beginners.
-
Reduces the need for traditional programming.
-
Makes prototyping easier.
-
Helps students understand application logic.
Disadvantages:
-
Advanced functionality may require paid features.
-
Less flexibility than custom programming.
-
Platform limitations can affect complex projects.
Practical Example:
A student can create a basic library management application with book listings, search functionality, and a simple borrowing interface.
Thunkable makes it possible to experiment with application development before learning a programming language.
6. FlutterFlow – Best Visual App Builder for Advanced Beginners
Best for: Beginners, freelancers, and entrepreneurs building data-driven applications.
Programming requirement: Low-code, with optional custom code.
Free access with paid plans
FlutterFlow is a visual development platform built around Flutter.
It allows users to create application screens, connect databases, configure navigation, and implement application workflows using a visual editor.
Unlike basic no-code builders, FlutterFlow also supports more advanced customization and Flutter code workflows.
Key Features:
-
Visual interface builder.
-
Database integration.
-
Authentication workflows.
-
API connections.
-
Reusable components.
-
Custom functions and actions.
-
Flutter-based application development.
Advantages:
-
Reduces manual coding.
-
Supports complex application interfaces.
-
Useful for rapid prototyping.
-
Offers a pathway toward Flutter development.
Disadvantages:
-
Advanced features can have a learning curve.
-
Some capabilities depend on subscription plans.
-
Generated code may require developer review and customization.
Practical Example:
You could create an online appointment booking application with user registration, service listings, available time slots, and booking records.
FlutterFlow is particularly useful when you want to move beyond simple visual app builders without immediately writing an entire application from scratch.
7. React Native – Best for JavaScript Developers
Best for: Beginners who already know JavaScript or want to learn it.
Programming languages: JavaScript and TypeScript.
Free and open-source
React Native is a framework for building mobile applications using React and JavaScript or TypeScript.
It allows developers to create Android and iOS applications while sharing substantial portions of their code.
React Native is a useful option for developers who already understand frontend development and want to expand into mobile application development.
Key Features:
-
JavaScript and TypeScript support.
-
Reusable components.
-
Native platform integrations.
-
Development tools and debugging.
-
Community packages.
-
Support for Android and iOS.
Advantages:
-
Suitable for JavaScript developers.
-
Supports cross-platform projects.
-
Encourages reusable code.
-
Open-source ecosystem.
-
Can reduce duplicated development work.
Disadvantages:
-
Requires understanding JavaScript and React.
-
Some native functionality requires platform-specific code.
-
Third-party package compatibility needs attention.
Practical Example:
A freelancer could build a task management application with user accounts, task lists, reminders, and synchronization.
React Native provides a practical development approach when you want to combine JavaScript skills with mobile development.
8. MIT App Inventor – Best for Students and First-Time Developers
Best for: School students, beginners, and programming learners.
Programming requirement: Visual block-based programming.
Free educational platform
MIT App Inventor is an educational platform designed to introduce people to application development through visual programming.
Instead of writing traditional programming statements, users connect blocks to define what an application should do.
It is especially helpful for learning basic programming concepts, application logic, and interaction design.
Key Features:
-
Visual drag-and-drop designer.
-
Block-based programming.
-
Mobile application testing.
-
Device functionality integration.
-
Beginner-focused learning environment.
-
Educational project support.
Advantages:
-
Easy to understand.
-
Suitable for students.
-
Requires little traditional coding.
-
Helps explain programming logic.
-
Useful for small educational projects.
Disadvantages:
-
Limited flexibility for advanced applications.
-
Not designed to replace professional development environments.
-
Complex interfaces and workflows can become difficult to manage.
Practical Example:
A beginner can create a simple calculator, quiz application, or classroom attendance project using visual programming blocks.
MIT App Inventor is a good choice for understanding how mobile applications work before moving toward professional coding tools.
9. Unity – Best for Mobile Game Development
Best for: Beginners interested in developing mobile games.
Programming language: C#.
Free personal eligibility with paid licensing options
Unity is a development engine used to create interactive 2D and 3D experiences, including mobile games.
Unlike conventional mobile app builders, Unity focuses on interactive graphics, game mechanics, physics, animations, and real-time rendering.
Beginners interested in developing Android or iOS games can use Unity to learn game development fundamentals.
Key Features:
-
2D and 3D development.
-
Scene and object management.
-
Physics simulation.
-
Animation tools.
-
C# scripting.
-
Cross-platform publishing support.
Advantages:
-
Suitable for mobile games.
-
Provides extensive development features.
-
Supports 2D and 3D projects.
-
Offers learning resources and community support.
Disadvantages:
-
More complicated than basic app builders.
-
Requires learning C# for custom game logic.
-
Complex games require performance optimization.
Practical Example:
You can create a simple educational mathematics game in which children answer questions, collect points, and unlock new levels.
Unity is worth considering if your application idea involves interactive gaming rather than conventional business functionality.
10. Firebase – Best Backend Platform for Beginners
Best for: Developers who need backend services without managing their own server infrastructure.
Programming languages: Multiple SDK-supported languages.
Free usage quotas with paid usage-based options
Firebase is a backend development platform that provides services for application authentication, databases, hosting, analytics, and other application requirements.
A backend is the part of an application responsible for processing information, managing users, and communicating with databases or external services.
Firebase can reduce the amount of backend infrastructure beginners need to build themselves.
Key Features:
-
User authentication.
-
Cloud Firestore database.
-
Realtime Database.
-
Application analytics.
-
Cloud messaging.
-
Crash reporting.
-
Cloud Functions.
Advantages:
-
Simplifies backend development.
-
Supports multiple programming environments.
-
Provides authentication and database services.
-
Offers a free starting tier.
-
Reduces server management requirements.
Disadvantages:
-
Usage-based costs can increase as an application grows.
-
Developers need to understand database security rules.
-
Platform-specific architecture can create migration considerations.
Practical Example:
Suppose you are building a student learning application. Firebase can manage student accounts, store course information, and synchronize learning progress.
It is important to configure authentication and database permissions correctly rather than assuming that connecting an application to Firebase automatically makes its data secure.
11. Figma – Best for Mobile App UI and UX Design
Best for: Beginners who want to design application interfaces before coding.
Main purpose: UI and UX design.
Free starter access with paid plans
Figma is a collaborative design platform used to create application layouts, prototypes, and user interface components.
UI means user interface, while UX means user experience. UI focuses on how an application looks, whereas UX focuses on how users interact with it.
Figma is not a complete application programming environment, but it is an important part of the app development workflow.
Key Features:
-
Wireframe creation.
-
Mobile interface design.
-
Interactive prototypes.
-
Reusable design components.
-
Collaboration.
-
Design systems.
-
Developer handoff features.
Advantages:
-
Visual design environment.
-
Useful before programming begins.
-
Helps identify interface problems early.
-
Supports team collaboration.
-
Suitable for beginners learning UI/UX design.
Disadvantages:
-
Does not independently build a complete functional mobile application.
-
Advanced design work requires practice.
-
Some collaboration and professional features depend on plan limits.
Practical Example:
Before developing a shopping application, you can use Figma to design the login screen, product listings, product details, shopping cart, and checkout interface.
This helps developers understand the required screens before starting implementation.
12. Git and GitHub – Best for Managing App Development Projects
Best for: Beginners and professional developers working on coding projects.
Main purpose: Version control and collaborative development.
Git is free and open-source; GitHub offers free and paid plans
Git is a version control system that tracks changes in source code.
GitHub provides online repositories where developers can store code, manage branches, review changes, and collaborate.
These tools are not application builders themselves. Instead, they help developers manage application projects more reliably.
Key Features:
-
Code version history.
-
Branch management.
-
Team collaboration.
-
Repository management.
-
Change tracking.
-
Code review.
-
Project issue tracking.
Advantages:
-
Helps prevent accidental code loss.
-
Makes collaboration easier.
-
Supports professional development workflows.
-
Useful for building a developer portfolio.
-
Integrates with many development environments.
Disadvantages:
-
Git commands take time to learn.
-
Beginners may find branching and merging confusing.
-
Public repositories require care to avoid exposing sensitive information.
Practical Example:
If you are developing a shopping application, you can create separate Git branches for login functionality, product listings, and payment integration.
After testing each feature, you can merge the changes into your main development branch.
Learning Git and GitHub early is a valuable habit for anyone planning to work professionally in software development.
Comparison of the Best App Development Software in 2026
Choosing software becomes easier when you compare the main tools according to their intended purpose, programming requirements, and development capabilities.
The following table provides a quick overview.
| Software | Best Use | Coding Required | Android | iOS |
|---|---|---|---|---|
| Android Studio | Native Android apps | Yes | Yes | No |
| Visual Studio Code | General development | Yes | With frameworks | With frameworks |
| Flutter | Cross-platform apps | Yes | Yes | Yes |
| Xcode | Native Apple apps | Yes | No | Yes |
| Thunkable | Visual app building | Minimal | Supported | Supported |
| FlutterFlow | Low-code development | Optional | Supported | Supported |
| React Native | Cross-platform apps | Yes | Yes | Yes |
| MIT App Inventor | Educational projects | Visual blocks | Yes | Platform support varies |
| Unity | Mobile games | Yes | Yes | Yes |
| Firebase | Backend services | Integration required | Supported | Supported |
| Figma | UI/UX design | No | Design | Design |
| Git/GitHub | Version control | Git knowledge | Project dependent | Project dependent |
Platform availability and publishing capabilities depend on the specific software version, configuration, subscription, and target device.
Which App Development Tool Should Beginners Choose?
There is no single tool that is best for every beginner.
Your choice should depend on what you want to build and how much programming you want to learn.
| Your Goal | Recommended Tool |
|---|---|
| Learn Android programming | Android Studio |
| Learn iPhone development | Xcode |
| Build Android and iOS apps | Flutter |
| Use JavaScript for mobile development | React Native |
| Create apps without traditional coding | Thunkable |
| Build advanced visual applications | FlutterFlow |
| Learn programming through visual blocks | MIT App Inventor |
| Develop mobile games | Unity |
| Design application interfaces | Figma |
| Manage application source code | Git and GitHub |
For complete beginners, MIT App Inventor and Thunkable provide accessible entry points. However, if your long-term goal is to become a professional application developer, learning a programming language and a development framework will provide more flexibility.
Free vs Paid App Development Software: Which Is Better?
One of the most common questions beginners ask is whether they need to purchase software to start developing mobile applications.
The answer is no. Several professional development tools are available without an upfront software license fee.
However, free software does not necessarily mean that every part of the development process is free.
Benefits of Free App Development Software
Free tools can help beginners:
-
Learn programming without an initial software purchase.
-
Create personal development projects.
-
Practice coding and debugging.
-
Experiment with application designs.
-
Build portfolio projects.
-
Understand mobile development workflows.
Android Studio, VS Code, Flutter, React Native, and Git are useful examples of free development technologies.
When Should You Consider Paid Software?
Paid tools may become useful when you need:
-
Advanced collaboration features.
-
More application builds or deployments.
-
Higher database and cloud usage limits.
-
Premium templates and integrations.
-
Advanced design and prototyping capabilities.
-
Business support and team management.
Before purchasing a subscription, compare its limitations and calculate the likely cost of using the platform as your application grows.
Important Development Costs Beginners Should Understand
Even when the development software is free, other expenses may apply.
| Expense | Why It May Be Required |
|---|---|
| Computer or laptop | Running development software |
| Internet connection | Downloading packages and accessing cloud services |
| Apple development membership | Required for certain Apple distribution workflows |
| Google Play registration | Required for publishing on Google Play |
| Backend services | Authentication, databases, and application infrastructure |
| Domain name | Useful for application websites and APIs |
| Cloud hosting | Hosting application backends |
| Design subscriptions | Accessing additional professional features |
Always check the current platform requirements and fees before planning a commercial application launch.
How to Choose the Right App Development Software for Your First Project
Selecting software without understanding your project requirements can waste time and money.
Before downloading development tools, consider the following factors.
1. Identify Your Application Type
Start by deciding what kind of application you want to create.
Examples include:
-
Educational applications.
-
E-commerce applications.
-
Social networking applications.
-
Business management applications.
-
Fitness and health applications.
-
Entertainment and gaming applications.
-
Productivity applications.
A simple educational quiz application has different requirements from an online shopping application with payment processing and order tracking.
2. Decide Whether You Want Native or Cross-Platform Development
Native development means creating applications specifically for an operating system.
For example:
-
Kotlin or Java with Android development tools for Android.
-
Swift with Xcode for iOS.
Cross-platform development allows developers to share much of their code between different operating systems.
Flutter and React Native are popular examples.
Choose native development when your project needs specialized platform functionality or you want to focus deeply on one operating system.
Choose cross-platform development when you want to support multiple platforms using a shared development approach.
3. Evaluate Your Programming Experience
Your current skill level should influence your software selection.
Complete beginners: Consider MIT App Inventor or Thunkable.
Beginners with programming knowledge: Explore Android Studio, VS Code, Flutter, or React Native.
Experienced developers: Consider specialized IDEs, frameworks, backend services, and automated testing tools.
Do not select complicated software simply because it is popular. Choose something that allows you to make steady progress.
4. Check Computer Requirements
App development software can consume considerable system resources.
Before installation, check:
-
Operating system compatibility.
-
Available RAM.
-
Processor capabilities.
-
Storage space.
-
Graphics requirements.
-
Virtualization support for emulators.
A lightweight code editor may run comfortably on a basic laptop, whereas running Android emulators and large IDE projects simultaneously may require more powerful hardware.
5. Consider Future Application Requirements
Think about what your application may need as it grows.
For example:
-
Will users need accounts?
-
Will information be stored in a database?
-
Will the application support payments?
-
Will you need push notifications?
-
Will multiple developers work on the project?
-
Will the application support Android and iOS?
Planning these requirements early helps you avoid unnecessary development changes later.
Step-by-Step Guide: How to Start Developing Your First Mobile Application
Once you have selected suitable software, the next step is to create your first project.
For this beginner-friendly example, we will use Flutter because it supports cross-platform development and provides a structured approach to building mobile interfaces.
Step 1: Define Your App Idea
Start with a small project rather than trying to build a complicated application immediately.
For example, create a simple task management application.
Its first version might include:
-
A home screen.
-
A task input field.
-
An Add Task button.
-
A task list.
-
A way to mark completed tasks.
This is enough to understand basic application development.
Step 2: Install Your Development Tools
Prepare your development environment by installing:
-
Flutter SDK.
-
Visual Studio Code or Android Studio.
-
Flutter and Dart extensions if using VS Code.
-
Android development components.
-
An Android emulator or compatible physical device.
Follow the installation requirements for your operating system and Flutter version.
Step 3: Create a Flutter Project
Open your terminal and run:
flutter create my_first_appMove into the project folder:
cd my_first_appStart the application:
flutter runThe application will launch on a configured emulator or connected device.
Step 4: Create a Simple Application Interface
Open the lib/main.dart file and replace its contents with this basic example:
import 'package:flutter/material.dart';

void main() {
  runApp(const MyApp());
}

class MyApp extends StatelessWidget {
  const MyApp({super.key});

  @override
  Widget build(BuildContext context) {
    return MaterialApp(
      debugShowCheckedModeBanner: false,
      title: 'My First App',
      home: Scaffold(
        appBar: AppBar(
          title: const Text('Task Manager'),
        ),
        body: const Center(
          child: Text(
            'Welcome to My First Mobile App!',
            style: TextStyle(fontSize: 20),
          ),
        ),
      ),
    );
  }
}
Step 5: Understand the Code
The example contains several important Flutter components.
-
main()is the entry point of the application. -
runApp()launches the Flutter application. -
MyAppdefines the main application widget. -
MaterialAppprovides the application structure and configuration. -
Scaffoldcreates a basic screen layout. -
AppBardisplays the top navigation bar. -
Centerpositions content in the middle of the screen. -
Textdisplays a message.
This small example introduces the basic structure of a Flutter application without requiring advanced programming concepts.
Step 6: Test Your Application
Run your application and check whether:
-
The application opens correctly.
-
The title appears in the navigation bar.
-
The welcome message is visible.
-
The interface fits the screen.
-
No unexpected errors appear.
Test your application on different screen sizes whenever possible.
Step 7: Improve Your First Application
After successfully running the basic application, gradually introduce new functionality.
For example:
-
Add a text input field.
-
Create an Add Task button.
-
Display tasks in a list.
-
Add a completion checkbox.
-
Introduce local data storage.
-
Improve the visual design.
Building your application step by step will make debugging and learning much easier.
Additional Tools Every Beginner App Developer Should Know
The 12 tools discussed above cover major development requirements, but professional application development usually involves additional technologies.
UI and UX Design Tools
Good application design improves usability and makes navigation easier.
Figma is useful for wireframes and interactive prototypes. Beginners should understand basic design concepts such as spacing, typography, color contrast, and consistent navigation.
Backend and Database Tools
Applications that store user accounts, messages, transactions, or other information require backend functionality.
Firebase and Supabase are two options developers can explore.
Your choice should depend on data requirements, authentication needs, database architecture, and expected application usage.
API Testing Tools
An API (Application Programming Interface) allows different software systems to communicate.
Postman helps developers send requests to APIs, inspect responses, and test application integrations.
For example, a shopping application might use an API to retrieve product information from a backend server.
Mobile Testing Tools
Testing is essential before releasing an application.
Useful testing approaches include:
-
Android emulators.
-
iOS simulators.
-
Physical Android and Apple devices.
-
Unit testing.
-
Integration testing.
-
Automated UI testing.
Appium is another option for automating mobile application tests.
Hosting and Deployment Tools
If your application needs a backend server, you will need a suitable hosting environment.
ToolMentors has additional educational guides that can help beginners understand this process:
These tutorials cover useful deployment concepts for developers working with server-side application technologies.
Common Mistakes Beginners Make When Choosing App Development Tools
Selecting the right development environment is important, but beginners can still encounter problems because of poor planning or unrealistic expectations.
1. Choosing Complicated Software Too Early
Some beginners immediately install several professional development tools without understanding their purpose.
This creates confusion and makes learning difficult.
Solution: Start with one development environment and learn its basic features before adding more tools.
2. Ignoring Programming Fundamentals
No-code platforms can simplify development, but they do not eliminate the importance of understanding application logic.
Solution: Learn basic concepts such as variables, conditions, functions, data structures, and debugging.
3. Selecting Tools Without Understanding Project Requirements
A game engine is not necessarily the best choice for a simple business application.
Similarly, a visual app builder may not provide enough flexibility for a complex application.
Solution: Define the application features before selecting the development software.
4. Ignoring Testing
An application that works on one device may not behave correctly on another.
Solution: Test different screen sizes, operating system versions, network conditions, and user interactions.
5. Neglecting Application Security
Poorly configured databases, exposed API keys, and weak authentication can put application data at risk.
Solution: Use secure authentication, protect sensitive credentials, apply database access rules, and validate user input.
6. Using Too Many Development Tools
Installing unnecessary plugins, frameworks, and packages can increase project complexity.
Solution: Choose a small, reliable development stack and add technologies only when they solve an actual requirement.
App Development Best Practices for Beginners in 2026
Developing an application involves more than writing code. You also need to think about usability, security, performance, and maintainability.
The following practices can help you build better applications.
Keep Your First Project Simple
Start with a minimum viable product (MVP), which is the simplest version of an application that provides its main functionality.
For example, your first shopping application might include product listings and a basic cart before introducing payment processing, recommendations, and advanced analytics.
Write Clean and Maintainable Code
Organize your project into logical files and reusable components.
Avoid placing all application functionality inside one large source file.
Use meaningful variable names, consistent formatting, and comments where they genuinely improve understanding.
Use Version Control from the Beginning
Git helps you track changes and recover earlier versions of your project.
Create commits after completing important development tasks, and use separate branches when experimenting with major features.
Prioritize Security
Security should be considered from the beginning of development.
Important measures include:
-
Use HTTPS for network communication.
-
Avoid storing passwords in plain text.
-
Implement appropriate authentication.
-
Protect API credentials and secrets.
-
Apply database access restrictions.
-
Validate user-submitted information.
-
Keep development dependencies updated.
Never assume that hiding a button or screen is sufficient to protect sensitive application data. Access restrictions must also be enforced by the backend.
Optimize Application Performance
Slow applications can frustrate users and negatively affect their experience.
To improve performance:
-
Optimize images and other large assets.
-
Avoid unnecessary background operations.
-
Reduce excessive network requests.
-
Use efficient database queries.
-
Monitor memory usage.
-
Test performance on lower-end devices.
Design for Different Screen Sizes
Your application should remain usable on different mobile devices.
Use responsive layouts, flexible components, and appropriate spacing.
Do not assume every user has the same screen dimensions or device capabilities.
Test Before Publishing
Complete testing before making your application available to users.
Check navigation, authentication, forms, database operations, notifications, and error handling.
For commercial applications, also review privacy requirements, platform policies, and applicable data protection obligations.
Advanced App Development Concepts Beginners Should Understand
Once you become comfortable with basic application development, learning advanced concepts will help you create more reliable and scalable projects.
Cross-Platform Architecture
Cross-platform development allows developers to share application logic across multiple operating systems.
However, not every feature can always be shared.
Some applications require native integrations for device sensors, Bluetooth, camera functionality, background processing, or platform-specific services.
Understanding these differences will help you choose between native and cross-platform development.
Application Programming Interfaces
APIs connect your mobile application with external services and backend systems.
For example, a weather application might retrieve forecast information from a weather API.
A beginner should understand:
-
HTTP requests.
-
GET and POST methods.
-
JSON data.
-
API authentication.
-
Response status codes.
-
Error handling.
These concepts are useful for developing applications that communicate with external systems.
Cloud-Based Application Development
Cloud services allow applications to store information and perform backend operations without requiring developers to maintain all infrastructure themselves.
Services such as Firebase and Supabase can simplify authentication, database management, and application integrations.
However, developers must understand usage limits, access permissions, data management, and costs.
Continuous Integration and Continuous Delivery
Continuous Integration (CI) and Continuous Delivery (CD) are development practices that automate parts of the software building, testing, and release process.
For example, a development team can configure a workflow that runs automated tests whenever new code is added to a repository.
These processes become especially useful when multiple developers work on the same application.
Application Monitoring and Analytics
After publishing an application, developers need to understand how it performs in real-world conditions.
Monitoring tools can help identify:
-
Application crashes.
-
Performance problems.
-
Failed requests.
-
Usage patterns.
-
Unexpected errors.
Collect only the information needed for legitimate application purposes and respect applicable privacy requirements.
20 Frequently Asked Questions About Best App Development Software and Tools for Beginners 2026
1. What is the best app development software for beginners in 2026?
The best app development software depends on your goals and programming experience. Android Studio is suitable for native Android development, Flutter is useful for cross-platform applications, and Thunkable is accessible to people without coding experience. Beginners should select software based on their project requirements rather than popularity alone.
2. Can beginners develop mobile applications without coding?
Yes. Beginners can use visual app development platforms such as Thunkable, MIT App Inventor, and FlutterFlow. These platforms provide drag-and-drop interfaces and visual logic tools. However, learning programming fundamentals becomes important when you want to customize functionality, integrate advanced services, or develop more complex applications.
3. What is the best free app development software?
Android Studio, Visual Studio Code, Flutter, React Native, and MIT App Inventor are useful free development options. Each serves a different purpose. Android Studio focuses on native Android development, Flutter supports cross-platform applications, and MIT App Inventor introduces beginners to visual programming.
4. Which software is best for Android app development?
Android Studio is the official development environment for Android applications. It supports Kotlin and Java and includes code editing, debugging, emulation, and application building features. Beginners interested in becoming professional Android developers should consider learning Kotlin alongside Android Studio.
5. Which software is best for iPhone app development?
Xcode is Apple’s official development environment for building iPhone and iPad applications. It supports Swift programming and provides tools for designing interfaces, testing applications, debugging code, and preparing releases. Developers normally need a Mac to use Xcode for standard iOS development workflows.
6. Which is better for beginners: Flutter or React Native?
Flutter and React Native are both useful cross-platform development frameworks. Flutter uses Dart, while React Native uses JavaScript or TypeScript. Beginners with JavaScript experience may find React Native more familiar. Those interested in Flutter’s UI development approach can choose Dart and Flutter for their learning journey.
7. Is Flutter free to use?
Yes. Flutter is an open-source development framework available without a software licensing fee. Developers can use it to build applications for supported platforms. However, additional expenses may apply for hosting, backend services, application distribution, third-party services, or other project requirements.
8. Can I create Android and iOS apps using one software?
Yes. Cross-platform frameworks such as Flutter and React Native allow developers to build applications for Android and iOS using a shared codebase. This can reduce duplicated development work. However, some platform-specific functionality may still require separate configuration or native programming.
9. What is the easiest software for creating mobile apps?
MIT App Inventor and Thunkable are beginner-friendly options because they use visual programming and drag-and-drop components. They allow users to experiment with application layouts and functionality without writing extensive code. Their suitability depends on the complexity and publishing requirements of the intended application.
10. Do I need a powerful computer for app development?
Not always. Lightweight editors and basic visual app builders can run on relatively modest computers. However, professional IDEs, Android emulators, and complex development projects may require more RAM, processor power, and storage. Check the official system requirements before installing development software.
11. What programming language should beginners learn for app development?
Kotlin is a useful choice for native Android development, while Swift is important for native Apple applications. Dart is used with Flutter, and JavaScript or TypeScript is useful for React Native. Beginners should select a language based on the development platform they want to pursue.
12. What is the difference between an IDE and a code editor?
An IDE provides an integrated development environment with features such as code editing, debugging, project management, and build tools. A code editor primarily focuses on writing and editing source code, although extensions can add additional functionality. Android Studio is an IDE, whereas Visual Studio Code is a code editor.
13. Is Firebase necessary for mobile app development?
No. Firebase is optional, but it can simplify backend development by providing services such as authentication, cloud databases, and application monitoring. Developers can also build their own backend systems or use alternative platforms. Your decision should depend on application functionality, architecture, security, and expected usage.
14. What is the best app development software for students?
MIT App Inventor, Thunkable, Flutter, and Android Studio are useful educational options. Students with no programming experience can begin with visual tools, while those interested in software engineering can learn Flutter or Android Studio. Building small projects is an effective way to develop practical skills.
15. How much does app development software cost?
Many development tools, including Flutter, Android Studio, VS Code, and React Native, are free to use. Some visual app builders and design platforms offer paid subscriptions for advanced features. Additional expenses can include hosting, databases, developer accounts, and application distribution fees.
16. Can I develop mobile games using app development software?
Yes. Unity is a popular option for creating 2D and 3D mobile games. It provides tools for animations, physics, scene management, and interactive gameplay. Beginners interested in game development should also learn C# and understand basic concepts such as game objects, collision detection, and performance optimization.
17. Which tools are used to test mobile applications?
Developers use Android emulators, iOS simulators, physical devices, and automated testing frameworks to evaluate mobile applications. Appium is one option for automated mobile testing. Testing should cover functionality, navigation, screen compatibility, performance, and security before an application is released.
18. Is GitHub necessary for app development?
GitHub is not compulsory, but it is extremely useful for managing development projects. Combined with Git, it allows developers to track code changes, maintain project history, collaborate with others, and recover earlier versions. Beginners should learn basic version control practices when starting their first coding projects.
19. How can I publish an application after developing it?
The publishing process depends on the target platform. Android applications can be prepared for distribution through Google Play, while iOS applications follow Apple’s distribution requirements. Developers generally need to prepare release builds, test functionality, configure application details, and meet the relevant platform policies.
20. What should I learn after choosing app development software?
Start by learning programming fundamentals, application interface design, data management, and debugging. Then explore APIs, authentication, databases, version control, testing, and deployment. Build small projects and gradually increase their complexity. Practical experience will help you understand how different development tools work together.
Conclusion: Choosing the Best App Development Software in 2026
Choosing the best app development software for beginners in 2026 depends on your experience, application requirements, budget, and long-term development goals.
If you want to create Android applications, Android Studio is an excellent option. For native iOS development, Xcode provides the necessary Apple development environment. Developers interested in building applications for multiple platforms can explore Flutter and React Native.
Similarly, Thunkable, MIT App Inventor, and FlutterFlow offer accessible approaches for people who want to experiment with application development without immediately learning extensive programming concepts.
However, selecting the right software is only the beginning. Successful application development also requires an understanding of programming fundamentals, user interface design, databases, APIs, security, testing, and deployment.
Here are some practical recommendations for beginners:
-
Start with one development platform instead of learning several simultaneously.
-
Build a small application to understand the development process.
-
Learn the programming language associated with your chosen framework.
-
Practice designing interfaces and creating user-friendly experiences.
-
Use Git and GitHub to manage your projects.
-
Test applications on different devices.
-
Learn backend development and database integration as your skills improve.
-
Explore advanced development concepts when you are comfortable with the basics.
Remember that you do not need expensive software to begin learning. Several powerful development tools are available for free, allowing you to develop practical skills and build portfolio projects without a large initial investment.
Final Call to Action
Whether you are a student learning programming, a freelancer developing applications for clients, or an aspiring software developer, choosing the right tools can make your learning journey easier.
At ToolMentors, our goal is to make technology, programming, software development, and digital tools easier to understand through practical educational guides.
Explore more tutorials, development resources, and useful online tools to improve your technical knowledge and build your skills.
Visit ToolMentors and continue learning, creating, and developing your next project!

4 Comments