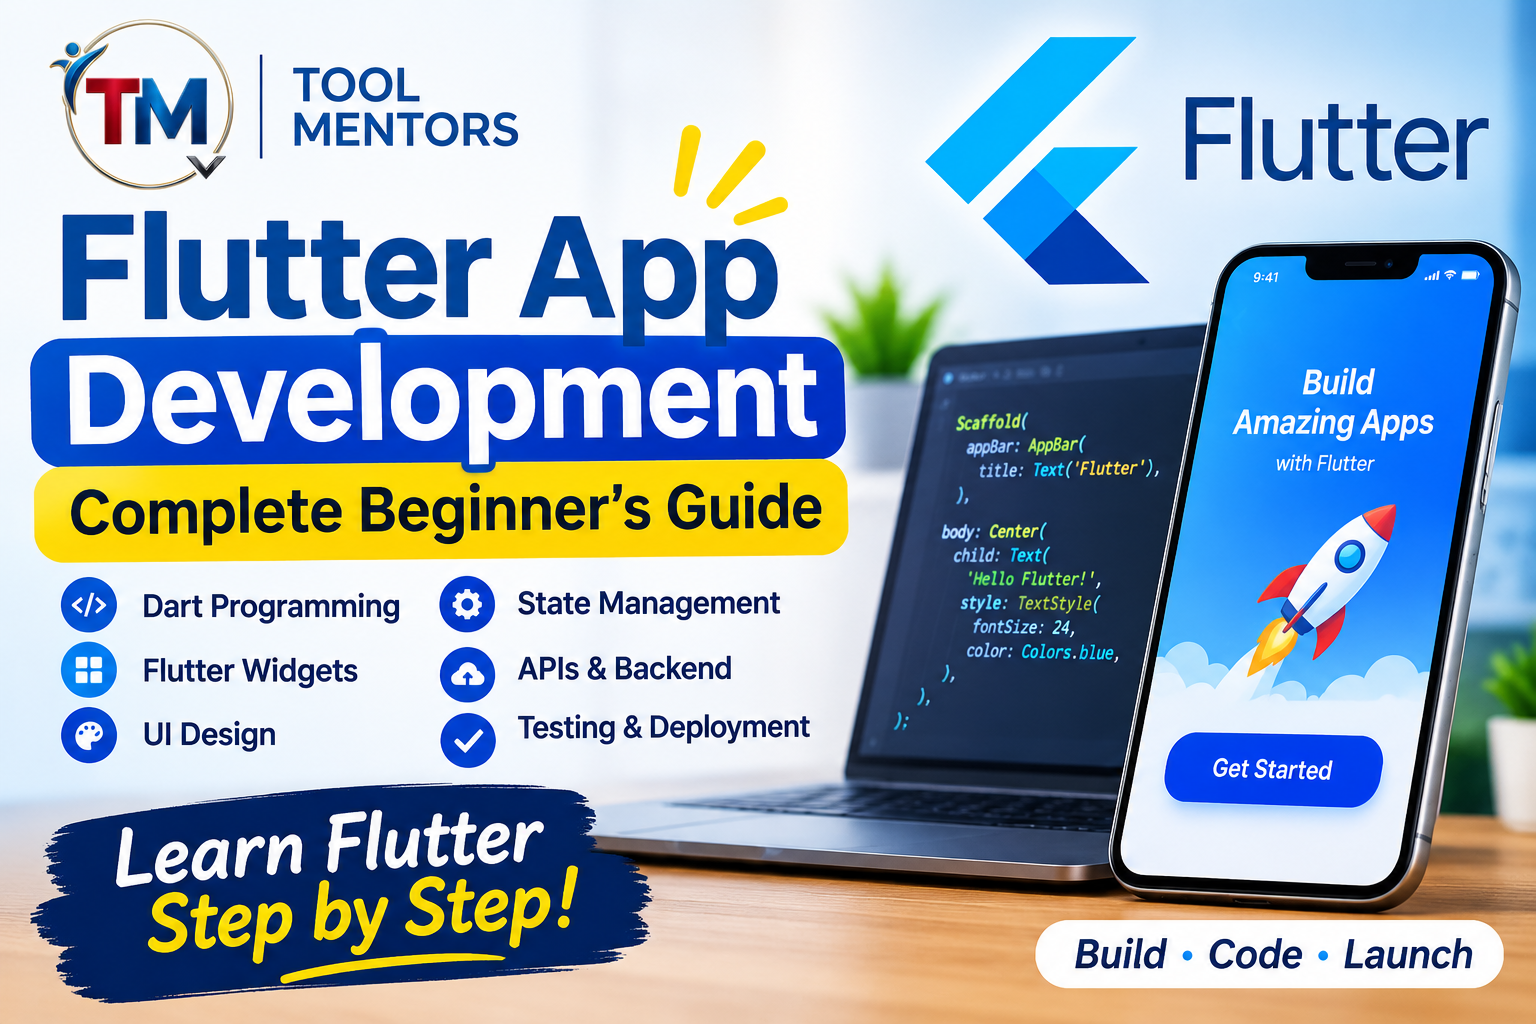
Flutter App Development: Complete Beginner’s Guide to Building Mobile Apps
Flutter app development has become an important approach to building modern mobile applications for Android and iOS. Instead of maintaining completely separate projects for different operating systems, developers can use Flutter to create applications with a shared codebase, reusable components, and customizable user interfaces.
Whether you are a student learning programming, a beginner interested in mobile development, a freelancer building applications for clients, or an experienced developer exploring cross-platform technologies, Flutter offers a practical development environment.
One of its biggest advantages is that developers can use the Dart programming language to build application interfaces and implement functionality across multiple platforms. Flutter also provides a collection of ready-to-use widgets, development tools, and features such as hot reload that make the development process more efficient.
In this complete guide, you will learn what Flutter is, how it works, why developers use it, how to install the necessary tools, and how to build your first Flutter application. We will also explore Dart programming, widgets, state management, APIs, databases, testing, security, performance optimization, and application deployment.
By the end, you will understand the complete Flutter development process and have a practical roadmap for starting your own projects.
4. What Is Flutter App Development?
Flutter app development is the process of creating applications using Flutter, an open-source UI (user interface) software development kit developed by Google.
Flutter allows developers to create applications for multiple platforms using a shared codebase. These platforms include:
-
Android
-
iOS
-
Web
-
Windows
-
macOS
-
Linux
Flutter uses Dart as its primary programming language. Developers write application logic and construct interfaces using Dart code and Flutter widgets.
Unlike traditional native development, where developers typically maintain separate Android and iOS application projects, Flutter allows much of the interface and business logic to be shared.
For example, imagine you want to develop a fitness application with the following features:
-
User registration and login.
-
Daily workout plans.
-
Calorie tracking.
-
Progress monitoring.
-
Personal fitness goals.
-
Notifications.
With Flutter, you can develop the main application functionality within one project and adapt the experience for different platforms.
How Does Flutter Work?
Flutter works through a combination of its framework, Dart programming language, rendering engine, and platform integration.
When a developer writes Flutter code, the framework uses widgets to describe the application interface. These widgets are arranged in a structure called the widget tree.
Flutter then processes this structure and renders the interface on the screen.
During development, Flutter supports hot reload, allowing developers to see many code changes without restarting the entire application.
For production builds, Dart uses ahead-of-time compilation for supported native targets, while web targets use web compilation technologies.
This development approach helps Flutter applications deliver consistent interfaces and responsive interactions.
Important Flutter Terminology
Before creating your first application, understand these important terms:
| Term | Meaning |
|---|---|
| Flutter | UI development framework for multiple platforms |
| Dart | Programming language used by Flutter |
| Widget | Building block of a Flutter interface |
| Widget tree | Hierarchical structure of application widgets |
| Hot reload | Updates supported code changes during development |
| State management | Method of managing changing application data |
| SDK | Software Development Kit |
| IDE | Integrated Development Environment |
| API | Interface that allows software systems to communicate |
| Emulator | Virtual device used for application testing |
| Package | Reusable code or functionality added to a project |
| Build | Process of preparing an application for execution or distribution |
Understanding these concepts will make Flutter development easier as you progress.
5. Why Is Flutter Popular for Mobile App Development?
Flutter is widely used because it combines cross-platform development, customizable UI components, and a productive development workflow.
However, its suitability depends on the project. It is important to understand both its advantages and limitations before selecting it for a professional application.
1. Cross-Platform Development
One of Flutter’s main advantages is its ability to support multiple platforms through a shared codebase.
Developers can reuse application logic and interface components instead of independently implementing every feature for Android and iOS.
This can reduce duplicated work and simplify maintenance.
2. Fast Development with Hot Reload
Hot reload allows developers to experiment with application interfaces and functionality quickly.
For example, if you change a button’s text, background color, or layout, you can often see the result without restarting the entire application.
Hot reload generally preserves the current application state, making it particularly useful when working on complex screens.
3. Customizable User Interfaces
Flutter provides extensive UI components that developers can combine to create customized application designs.
You can create:
-
Login and registration screens.
-
Navigation menus.
-
Interactive dashboards.
-
Product listings.
-
Forms and input fields.
-
Animated components.
-
Charts and progress indicators.
This flexibility makes Flutter useful for applications with distinctive visual requirements.
4. Reusable Widgets
Flutter encourages developers to divide interfaces into reusable widgets.
For example, an application might contain separate widgets for:
-
Navigation bars.
-
Product cards.
-
Profile information.
-
Search fields.
-
Buttons.
-
Notifications.
Reusing these components improves code organization and makes future changes easier.
5. Open-Source Development Framework
Flutter is open-source and can be used without purchasing a commercial framework license.
Developers can explore its source code, contribute to its ecosystem, and use community packages to extend application functionality.
Additional services, hosting, and third-party tools may still involve costs.
6. Suitable for Different Project Sizes
Flutter can be used for small personal projects, business applications, educational platforms, and larger commercial products.
However, larger applications require appropriate architecture, testing, state management, and performance planning.
6. Flutter vs Native App Development vs React Native
Before learning Flutter, beginners should understand how it compares with other mobile development approaches.
There are three common options:
-
Native app development.
-
Flutter cross-platform development.
-
React Native development.
Flutter vs Native Development
Native development involves building applications specifically for an operating system.
For example, Android applications can be developed using Kotlin, while iOS applications can be developed using Swift.
Flutter uses Dart and allows developers to share much of their code across platforms.
| Feature | Flutter | Native Development |
|---|---|---|
| Programming language | Dart | Kotlin or Swift |
| Code sharing | High for shared application logic | Usually limited between platforms |
| UI development | Flutter widgets | Platform-native UI frameworks |
| Platform integration | Plugins and native integrations | Direct platform APIs |
| Development approach | Cross-platform | Platform-specific |
| Custom UI | Extensive flexibility | Platform-dependent |
| Maintenance | Shared code can simplify maintenance | Separate platform projects may be needed |
Which should you choose?
Choose Flutter when you want to build applications for multiple platforms using a shared development approach.
Choose native development when your application requires deep platform integration, specialized operating system features, or a platform-specific development strategy.
Flutter vs React Native
React Native is another popular cross-platform development framework.
It uses JavaScript or TypeScript and the React programming model.
Flutter uses Dart and its own widget-based UI approach.
| Feature | Flutter | React Native |
|---|---|---|
| Language | Dart | JavaScript or TypeScript |
| UI approach | Flutter widgets | React components and native platform views |
| Code sharing | High | High |
| Development tools | Flutter SDK and IDE integrations | React Native tooling |
| Hot reload | Yes | Fast refresh |
| Custom interface | Extensive widget customization | Native components and custom solutions |
| Learning requirement | Dart knowledge | JavaScript and React knowledge |
Both frameworks are useful. Your existing programming experience and project requirements should influence your decision.
7. Understanding Dart: The Programming Language Behind Flutter
Dart is an object-oriented programming language used to develop Flutter applications.
It provides programming features such as variables, functions, classes, asynchronous operations, and null safety.
If you are new to programming, learning Dart fundamentals will make Flutter development considerably easier.
Essential Dart Concepts for Beginners
Variables and Data Types
Variables store information that your application can use.
Example:
void main() {
  String userName = 'Alex';
  int age = 25;
  double height = 5.9;
  bool isLoggedIn = true;

  print(userName);
  print(age);
}
In this example:
-
Stringstores text. -
intstores whole numbers. -
doublestores decimal numbers. -
boolstores true or false values.
Functions
Functions allow you to organize reusable instructions.
void greetUser(String name) {
  print('Welcome, $name!');
}

void main() {
  greetUser('Alex');
}
You can use functions for calculations, data processing, validation, and other application tasks.
Conditional Statements
Conditional statements allow applications to make decisions.
void main() {
  int score = 85;

  if (score >= 80) {
    print('Excellent performance');
  } else {
    print('Keep practicing');
  }
}
For example, a fitness application could use conditions to display different messages depending on a user’s daily activity.
Classes and Objects
Dart supports object-oriented programming.
A class defines the structure and behavior of an object.
class Student {
  String name;
  int age;

  Student(this.name, this.age);

  void displayInfo() {
    print('Name: $name');
    print('Age: $age');
  }
}

void main() {
  Student student = Student('Alex', 21);

  student.displayInfo();
}
Classes are useful for organizing application data, such as users, products, orders, and transactions.
Asynchronous Programming
Mobile applications frequently communicate with external services.
For example, an application might retrieve user information from a remote server.
Dart supports Future, async, and await for handling asynchronous operations.
Future<String> fetchUserName() async {
  await Future.delayed(
    const Duration(seconds: 2),
  );

  return 'Alex';
}

void main() async {
  String name = await fetchUserName();

  print(name);
}
This example simulates a delayed operation. In a real application, asynchronous programming is commonly used for network requests and database operations.
Why Should You Learn Dart Before Flutter?
You do not need to become an expert Dart programmer before starting Flutter.
However, you should understand:
-
Variables and data types.
-
Functions and parameters.
-
Conditional statements.
-
Loops.
-
Lists and maps.
-
Classes and objects.
-
Null safety.
-
Asynchronous programming.
These concepts provide the foundation for building functional Flutter applications.
8. Understanding Flutter Widgets and UI Design
Widgets are the fundamental building blocks of Flutter applications.
Almost every visible element in a Flutter interface is represented by a widget.
For example, text, buttons, images, layouts, padding, and navigation components are all created using widgets.
Flutter uses a declarative UI approach. Developers describe what the interface should look like for a particular state, and the framework handles the process of updating it.
Types of Flutter Widgets
Two important widget categories are StatelessWidget and StatefulWidget.
StatelessWidget
A StatelessWidget is suitable for UI components that do not manage changing internal state.
Example:
import 'package:flutter/material.dart';

class WelcomeMessage extends StatelessWidget {
  const WelcomeMessage({super.key});

  @override
  Widget build(BuildContext context) {
    return const Text(
      'Welcome to Flutter!',
    );
  }
}
This widget displays a message without managing changing data.
Common examples include:
-
Static labels.
-
Icons.
-
Decorative elements.
-
Fixed informational sections.
StatefulWidget
A StatefulWidget is used when a component needs to update its appearance based on changing state.
For example, a counter application needs to display a different number whenever the user presses a button.
import 'package:flutter/material.dart';

class CounterExample extends StatefulWidget {
  const CounterExample({super.key});

  @override
  State<CounterExample> createState() =>
      _CounterExampleState();
}

class _CounterExampleState
    extends State<CounterExample> {

  int counter = 0;

  void increaseCounter() {
    setState(() {
      counter++;
    });
  }

  @override
  Widget build(BuildContext context) {
    return Scaffold(
      body: Center(
        child: Column(
          mainAxisAlignment:
              MainAxisAlignment.center,
          children: [
            Text(
              'Count: $counter',
              style: const TextStyle(
                fontSize: 24,
              ),
            ),
            ElevatedButton(
              onPressed: increaseCounter,
              child: const Text('Increase'),
            ),
          ],
        ),
      ),
    );
  }
}
Here, setState() tells Flutter that the state has changed and the relevant widget needs rebuilding.
Common Flutter Layout Widgets
| Widget | Purpose |
|---|---|
| Container | Provides layout and decoration |
| Row | Arranges children horizontally |
| Column | Arranges children vertically |
| Stack | Places widgets on top of each other |
| Center | Centers a child widget |
| Padding | Adds space around a widget |
| Expanded | Allows a child to occupy available space |
| ListView | Displays scrollable lists |
| GridView | Displays content in a grid |
| Scaffold | Provides a standard application screen structure |
Learning these widgets will help you create responsive and organized application interfaces.
Flutter Material and Cupertino Widgets
Flutter provides two major design approaches:
-
Material widgets for interfaces following Google’s Material Design principles.
-
Cupertino widgets for interfaces following Apple’s iOS visual conventions.
You can use these components to create interfaces that feel familiar on different platforms.
9. Tools Required for Flutter App Development
Before building a Flutter application, you need a development environment.
The following tools are commonly used.
Flutter SDK
The Flutter Software Development Kit provides the framework, command-line tools, and development capabilities required to create Flutter projects.
Dart SDK
The Dart SDK provides the programming language tools required to develop Flutter applications. It is included with the Flutter SDK.
Visual Studio Code
VS Code is a lightweight editor that supports Flutter development through extensions.
It provides:
-
Code completion.
-
Syntax highlighting.
-
Debugging.
-
Integrated terminal.
-
Project navigation.
Android Studio
Android Studio provides a full development environment with Android SDK management, emulators, debugging tools, and Flutter support.
Xcode
Xcode is required for standard iOS build and deployment workflows on macOS.
Flutter DevTools
Flutter DevTools provides debugging and performance analysis capabilities.
Developers can inspect widget trees, analyze memory usage, investigate performance issues, and diagnose application behavior.
10. How to Install Flutter and Set Up Your Development Environment
Setting up Flutter correctly is the first practical step toward building applications.
The exact installation process depends on your operating system.
Step 1: Check Your System Requirements
Before installation, check:
-
Operating system compatibility.
-
Available disk space.
-
RAM.
-
Processor requirements.
-
Required development dependencies.
You should also decide whether you will initially develop for Android, iOS, or web.
Step 2: Install the Flutter SDK
Download and install the Flutter SDK for your operating system.
Extract the SDK into a suitable directory and configure the Flutter executable in your system’s PATH environment variable.
This allows you to execute Flutter commands from your terminal.
Step 3: Install an IDE
Choose either:
-
Visual Studio Code.
-
Android Studio.
Install the Flutter and Dart extensions or plugins supported by your selected IDE.
Step 4: Configure Android Development
If you want to build Android applications, install the Android development components required by Flutter.
These typically include:
-
Android SDK.
-
Platform tools.
-
Build tools.
-
Android emulator.
-
Required SDK licenses.
Step 5: Check Your Installation
Open a terminal and execute:
flutter doctorThis command checks your Flutter environment and reports missing dependencies or configuration problems.
Follow the recommendations shown in the output.
Step 6: Create Your First Project
Run:
flutter create my_first_appMove into the project directory:
cd my_first_appRun the application:
flutter runIf your development environment is configured correctly, Flutter will launch the application on your selected device or emulator.
11. Step-by-Step Tutorial: Build Your First Flutter Application
Now that you understand the development environment, let’s create a simple application.
We will build a basic task management interface.
The goal is to learn how Flutter widgets work together and how application state changes.
Step 1: Open the Project
Open your project in VS Code or Android Studio.
Navigate to:
lib/main.dartThis is the main Dart file in a standard Flutter project.
Step 2: Add the Application Code
Replace the contents of main.dart with:
import 'package:flutter/material.dart';

void main() {
  runApp(const TaskApp());
}

class TaskApp extends StatelessWidget {
  const TaskApp({super.key});

  @override
  Widget build(BuildContext context) {
    return MaterialApp(
      debugShowCheckedModeBanner: false,
      title: 'Task Manager',
      theme: ThemeData(
        colorSchemeSeed: Colors.blue,
        useMaterial3: true,
      ),
      home: const TaskHomePage(),
    );
  }
}

class TaskHomePage extends StatefulWidget {
  const TaskHomePage({super.key});

  @override
  State<TaskHomePage> createState() =>
      _TaskHomePageState();
}

class _TaskHomePageState
    extends State<TaskHomePage> {

  final TextEditingController controller =
      TextEditingController();

  final List<String> tasks = [];

  void addTask() {
    final task = controller.text.trim();

    if (task.isEmpty) return;

    setState(() {
      tasks.add(task);
      controller.clear();
    });
  }

  @override
  void dispose() {
    controller.dispose();
    super.dispose();
  }

  @override
  Widget build(BuildContext context) {
    return Scaffold(
      appBar: AppBar(
        title: const Text('My Task Manager'),
      ),
      body: Padding(
        padding: const EdgeInsets.all(16),
        child: Column(
          children: [
            TextField(
              controller: controller,
              decoration: const InputDecoration(
                labelText: 'Enter a new task',
                border: OutlineInputBorder(),
              ),
              onSubmitted: (_) => addTask(),
            ),
            const SizedBox(height: 12),
            ElevatedButton(
              onPressed: addTask,
              child: const Text('Add Task'),
            ),
            const SizedBox(height: 20),
            Expanded(
              child: ListView.builder(
                itemCount: tasks.length,
                itemBuilder: (context, index) {
                  return ListTile(
                    leading: const Icon(
                      Icons.check_circle_outline,
                    ),
                    title: Text(tasks[index]),
                  );
                },
              ),
            ),
          ],
        ),
      ),
    );
  }
}
Step 3: Understand the Application
This example introduces several important Flutter concepts.
TaskApp: The main application widget that configures the application.
TaskHomePage: A stateful screen that manages the task list.
TextEditingController: Reads and manages the text entered by the user.
List: Stores the task information.
addTask(): Adds a new task to the list.
setState(): Updates the interface when a new task is added.
ListView.builder: Creates a scrollable list of tasks.
dispose(): Releases the text controller when the widget is removed.
Step 4: Run and Test the Application
Execute:
flutter runTry the following:
-
Enter a task in the text field.
-
Press Add Task.
-
Check whether the task appears.
-
Enter another task.
-
Test the application with an empty input.
The application currently stores tasks in memory, meaning they disappear when the application is restarted. Persistent storage can be added later.
Step 5: Improve the Project
After completing the basic version, consider adding:
-
Task completion checkboxes.
-
Task deletion.
-
Local database storage.
-
Due dates.
-
Search functionality.
-
User authentication.
-
Cloud synchronization.
This is a practical way to progress from a basic Flutter project to a more complete application.
12. State Management in Flutter Applications
State management is the process of managing information that changes while an application is running.
For example, consider a shopping application. When a user adds a product to the shopping cart, the application must update the cart count and display the selected product.
This changing information is called application state.
Understanding setState()
Flutter provides setState() for managing simple local state.
It is suitable for:
-
Counter applications.
-
Form interactions.
-
Expanding and collapsing sections.
-
Simple screen-level changes.
-
Small interactive components.
However, as an application grows, managing all information through individual setState() calls can make the code difficult to maintain.
Popular Flutter State Management Solutions
| Solution | Best suited for |
|---|---|
| setState | Simple local state |
| Provider | Shared application state |
| Riverpod | Scalable and testable state management |
| BLoC/Cubit | Structured event-driven applications |
| ValueNotifier | Simple observable values |
Beginners should start with setState() and learn Provider or Riverpod when their applications require shared state.
When Should You Use Advanced State Management?
Consider a larger application containing:
-
User authentication.
-
Shopping cart functionality.
-
Product information.
-
User preferences.
-
Notifications.
-
Payment status.
Instead of managing all these features inside individual screens, organize state and business logic into appropriate components.
This improves code readability, testing, and long-term maintenance.
13. Navigation and Routing in Flutter
Navigation allows users to move between different screens within an application.
For example, an e-commerce application might contain:
-
Home screen.
-
Product listing screen.
-
Product details screen.
-
Shopping cart.
-
Checkout screen.
-
User profile.
Flutter provides navigation functionality through the Navigator API.
Basic Screen Navigation Example
Navigator.push(
  context,
  MaterialPageRoute(
    builder: (context) => const DetailsScreen(),
  ),
);
This pushes another screen onto the navigation stack.
To return to the previous screen:
Navigator.pop(context);Using Named Routes
For larger applications, developers may prefer a more organized routing approach.
Flutter also supports declarative navigation and routing packages such as go_router.
The appropriate navigation approach depends on the application’s complexity, deep-linking requirements, and navigation structure.
14. Connecting Flutter Applications to APIs
Most modern mobile applications need information from external services.
An API allows an application to communicate with another software system.
For example, a weather application might retrieve temperature information from a weather service, while an online shopping application might retrieve product details from its backend.
Understanding REST APIs
REST APIs commonly use HTTP methods to perform different operations.
| HTTP Method | Purpose |
|---|---|
| GET | Retrieve information |
| POST | Create or submit information |
| PUT | Replace existing information |
| PATCH | Update selected information |
| DELETE | Remove information |
Making an API Request in Flutter
Flutter developers can use the http package for basic HTTP requests.
First, add the package to your project dependencies.
Then use an example like this:
import 'dart:convert';
import 'package:http/http.dart' as http;

Future<void> fetchData() async {
  final uri = Uri.parse(
    'https://example.com/api/products',
  );

  try {
    final response = await http.get(uri);

    if (response.statusCode == 200) {
      final data = jsonDecode(response.body);

      print(data);
    } else {
      print('Request failed: ${response.statusCode}');
    }
  } catch (error) {
    print('Network error: $error');
  }
}
The example uses a placeholder API address. Replace it with your own backend endpoint before running it.
Important API Development Practices
When connecting Flutter applications to APIs:
-
Handle network errors.
-
Check HTTP response status codes.
-
Validate received information.
-
Handle loading states.
-
Manage timeouts.
-
Avoid exposing secret API credentials.
-
Use HTTPS for production communication.
A good API integration should provide useful feedback when a server is unavailable or a request fails.
15. Database Integration and Data Storage in Flutter
Applications frequently need to store information.
For example, a fitness application might store workout history, while a task management application might save completed tasks.
Flutter supports several storage approaches.
Local Data Storage
Local storage keeps information on the user’s device.
Common options include:
-
SharedPreferences for simple preferences.
-
SQLite for relational local databases.
-
Hive for local key-value storage.
-
Isar for local database use cases.
Choose storage based on the structure, volume, and querying requirements of your information.
Cloud Database Integration
Cloud databases allow applications to store and retrieve information through remote services.
Firebase Cloud Firestore and Firebase Realtime Database are examples of services that can be integrated with Flutter.
A cloud database can support features such as:
-
User profiles.
-
Shared records.
-
Online synchronization.
-
Application data management.
-
Real-time updates.
Local vs Cloud Storage
| Feature | Local Storage | Cloud Storage |
|---|---|---|
| Data location | User’s device | Remote infrastructure |
| Internet requirement | Often works offline | Usually requires connectivity |
| Synchronization | Must be implemented if needed | Can support remote synchronization |
| Multi-device access | Limited without synchronization | Supported when properly configured |
| Main use | Preferences and offline information | Shared and remotely accessible data |
Many applications combine both approaches to provide a better user experience.
16. Testing and Debugging Flutter Applications
Testing is an essential part of professional Flutter app development.
An application that works on one device may behave differently on another device because of screen sizes, operating system versions, permissions, or hardware differences.
Flutter supports different testing levels.
Unit Testing
Unit tests check individual functions, classes, or business logic components.
For example, you might test whether a calculator correctly adds two numbers.
Widget Testing
Widget tests check individual Flutter widgets and their interactions.
You can verify whether:
-
A button appears.
-
Text displays correctly.
-
A user can enter information.
-
A widget updates after an interaction.
Integration Testing
Integration tests evaluate multiple application components working together.
For example, you could test the complete login process, including form submission, authentication, and navigation.
Common Flutter Debugging Tools
| Tool | Purpose |
|---|---|
| Flutter DevTools | Debugging and performance analysis |
| Flutter Inspector | Examining widget structure |
| Dart Analyzer | Identifying code problems |
| Android Emulator | Testing Android applications |
| iOS Simulator | Testing iOS applications |
| Flutter Test | Running automated tests |
Common Flutter Errors and Their Solutions
| Problem | Possible Solution |
|---|---|
| Flutter command not recognized | Check SDK installation and PATH |
| Dependencies not found | Run flutter pub get |
| Emulator not detected | Check device configuration |
| Application crashes | Inspect error logs and stack traces |
| UI overflows | Review layout constraints and scrolling |
| API request fails | Check endpoint, connectivity, and response |
| Plugin build errors | Check plugin and platform compatibility |
A consistent testing process helps identify problems before users encounter them.
17. Flutter App Deployment: How to Publish Your Application
After developing and testing your application, the next stage is deployment.
Deployment means preparing and distributing your application so that users can install or access it.
Android App Deployment
For Android applications, Flutter supports generating release builds.
For example, you can create an Android App Bundle using:
flutter build appbundle --releaseAn Android App Bundle is a publishing format used for distributing Android applications through Google Play.
Before publishing, review:
-
Application name.
-
Package identifier.
-
Application icon.
-
Version number.
-
Signing configuration.
-
Permissions.
-
Release testing.
-
Store listing information.
iOS App Deployment
iOS application deployment generally requires macOS and Xcode.
A typical workflow includes:
-
Configure the iOS project.
-
Set the application identifier.
-
Configure signing.
-
Build the release application.
-
Test on supported devices.
-
Prepare the distribution submission.
An Apple Developer account is generally required for App Store distribution.
Flutter Web Deployment
Flutter also supports web builds.
You can generate a release web build using:
flutter build web --releaseThe resulting web files can be deployed to an appropriate hosting environment.
Important Deployment Considerations
Before releasing your application:
-
Test the release build.
-
Check application permissions.
-
Review privacy requirements.
-
Configure production API endpoints.
-
Verify application icons and branding.
-
Check offline and error behavior.
-
Monitor application crashes.
A successful development build does not automatically mean the application is ready for public distribution.
18. Security and Performance Optimization in Flutter
Security and performance should be considered throughout the development process rather than added only before launch.
A poorly optimized or insecure application can create problems for users and businesses.
Flutter Application Security Best Practices
Important security measures include:
1. Use HTTPS
Protect communication between your application and backend services by using encrypted network connections.
2. Secure Authentication
Use established authentication systems and implement appropriate session management.
3. Protect Sensitive Information
Do not store passwords, private keys, or secret API credentials directly in source code.
4. Validate User Input
Validate information on both the application and server sides.
5. Apply Appropriate Permissions
Request only the device permissions necessary for application functionality.
6. Protect Backend Resources
Do not assume that hiding a button in the application protects the underlying server functionality. Enforce authorization on the backend.
Flutter Performance Optimization
Follow these practices to improve application performance.
-
Use
constconstructors where appropriate. -
Avoid unnecessarily expensive operations inside
build()methods. -
Use lazy list builders for large lists.
-
Optimize image dimensions and formats.
-
Avoid unnecessary widget rebuilds.
-
Profile performance using Flutter DevTools.
-
Reduce unnecessary package dependencies.
-
Test performance in release mode.
Responsive UI Design
A mobile application should work across different device sizes.
Use appropriate layout widgets, constraints, and responsive design techniques instead of relying on fixed dimensions everywhere.
For example, LayoutBuilder can help build interfaces according to the available space.
Accessibility is also important. Provide readable text, sufficient contrast, and meaningful labels for interactive elements.
19. Advanced Flutter Concepts for Professional Developers
Once you understand the fundamentals, you can explore advanced Flutter development concepts.
Clean Architecture
Clean Architecture separates application responsibilities into logical layers.
A project might include:
-
Presentation layer.
-
Domain layer.
-
Data layer.
The presentation layer handles the user interface, the domain layer contains business rules, and the data layer manages information sources.
This separation can make complex projects easier to maintain and test.
Dependency Injection
Dependency injection allows components to receive the services they need rather than creating every dependency themselves.
It improves testability and reduces unnecessary coupling between application components.
Custom Widgets
As projects grow, creating reusable custom widgets becomes increasingly important.
For example, a banking application might use reusable widgets for account cards, transaction lists, balance displays, and confirmation dialogs.
Animations
Flutter supports animation capabilities for creating interactive interfaces.
Developers can use implicit animations for simple transitions and explicit animation controllers for more complex movement.
Platform Channels
Sometimes a Flutter application needs access to functionality that is not directly available through an existing Flutter package.
Platform channels allow Flutter code to communicate with platform-specific code, such as Kotlin or Swift implementations.
This is useful for specialized hardware features and native integrations.
Continuous Integration and Continuous Delivery
CI/CD refers to automated development and release workflows.
A CI/CD pipeline can help teams:
-
Analyze code.
-
Run automated tests.
-
Build application packages.
-
Verify release configurations.
-
Prepare deployment artifacts.
Automation can improve consistency when maintaining larger applications.
20. Best Practices for Successful Flutter App Development
Learning Flutter syntax is only one part of becoming a capable application developer.
You also need good development habits.
Plan Your Application Before Coding
Identify the application’s target users, important features, and navigation structure before writing code.
Use a Modular Project Structure
Organize files by feature or responsibility.
For example:
lib/
  main.dart
  models/
  services/
  screens/
  widgets/
  repositories/
  utils/
This is a simple organizational example. Larger projects may require a more detailed structure.
Keep Widgets Reusable
Avoid repeating the same UI code across multiple screens.
Create reusable components when they improve consistency and maintainability.
Follow Consistent Naming Conventions
Use descriptive names for classes, methods, variables, and files.
For example, UserProfileScreen is more meaningful than Screen2.
Manage Dependencies Carefully
Before adding a package, consider its maintenance status, compatibility, security, and whether you actually need it.
Test on Real Devices
Emulators are useful, but physical devices can reveal issues related to performance, permissions, sensors, and hardware.
Document Important Decisions
Keep useful documentation about application architecture, API requirements, and development workflows.
This becomes particularly valuable when working with other developers.
21. Common Flutter App Development Mistakes and How to Avoid Them
Beginners often encounter similar problems when learning Flutter.
Understanding these mistakes early can save time.
| Common mistake | Better approach |
|---|---|
| Learning Flutter without Dart basics | Practice Dart fundamentals first |
| Putting everything in one file | Separate screens, services, and widgets |
| Overusing setState | Introduce appropriate state management |
| Ignoring responsive design | Test multiple screen sizes |
| Adding too many packages | Use only necessary dependencies |
| Skipping automated tests | Add tests as features grow |
| Storing sensitive credentials in code | Use secure backend configuration |
| Ignoring error handling | Handle loading, success, and failure states |
| Testing only in debug mode | Test production release builds |
| Building too many features initially | Start with an MVP |
A successful development process focuses on building a stable application rather than adding features as quickly as possible.
22. Flutter App Development Roadmap for Beginners
If you want to become a Flutter developer, follow a structured learning path.
-
Learn programming fundamentals
Understand variables, functions, conditions, loops, classes, and object-oriented programming.
-
Learn Dart
Practice Dart syntax, null safety, collections, and asynchronous programming.
-
Understand Flutter widgets
Learn StatelessWidget, StatefulWidget, layout widgets, and the widget tree.
-
Build simple interfaces
Create login screens, forms, dashboards, and navigation menus.
-
Learn state management
Start with setState and progress to Provider, Riverpod, or BLoC.
-
Work with APIs and databases
Learn how to retrieve information, authenticate users, and store application data.
-
Build practical projects
Create a calculator, task manager, weather interface, or shopping application.
-
Learn testing and deployment
Test applications, optimize performance, and prepare release builds.
Beginner Flutter Project Ideas
| Project | Skills You Will Learn |
|---|---|
| Calculator | Functions and UI interactions |
| To-do application | State management and lists |
| Weather application | API integration |
| Expense tracker | Data models and storage |
| Fitness tracker | Forms, charts, and local data |
| Shopping application | Navigation, APIs, and cart state |
| Notes application | CRUD operations and databases |
Building these projects will help you develop a portfolio and demonstrate practical skills to potential clients or employers.
23. Relevant ToolMentors Internal Links
Continue learning with these related ToolMentors tutorials:
1. What Is App Development? A Complete Beginner’s Guide – Understand the fundamentals and complete application development lifecycle.
2. Types of App Development: Native vs Hybrid vs Web Apps – Compare different application development approaches.
3. Best Programming Languages for App Development – Explore programming languages used to build modern applications.
4. Best App Development Software and Tools for Beginners – Discover development environments and software tools.
5. UI/UX Design for Mobile Apps – Learn how to design user-friendly mobile interfaces.
24. 20 Frequently Asked Questions About Flutter App Development
1. What is Flutter app development?
Flutter app development is the process of creating applications using Google’s open-source Flutter framework. Developers use Dart to build application interfaces and functionality for Android, iOS, web, and desktop platforms. Flutter supports reusable widgets and shared code, making it useful for cross-platform software development.
2. Is Flutter good for beginners?
Yes. Flutter is a suitable framework for beginners who want to learn mobile application development. Its widget-based approach makes interface development easier to understand. However, beginners should first learn basic Dart programming concepts, including variables, functions, classes, and asynchronous programming.
3. Which programming language is used in Flutter?
Flutter uses Dart as its primary programming language. Dart supports object-oriented programming, asynchronous operations, null safety, and modern language features. Developers use Dart to create application logic, manage information, and construct user interfaces using Flutter widgets.
4. Can Flutter develop both Android and iOS applications?
Yes. Flutter allows developers to create Android and iOS applications using a shared codebase. This can reduce duplicated programming work and simplify application maintenance. However, certain platform-specific features may require additional native configuration or integration with Kotlin and Swift.
5. Is Flutter free to use?
Yes. Flutter is an open-source framework that developers can use without paying a framework licensing fee. The Flutter SDK and its core development tools are available without a purchase. However, hosting, backend services, third-party subscriptions, and application distribution may involve additional costs.
6. How long does it take to learn Flutter?
The learning time depends on your programming experience, available practice time, and project complexity. A beginner can start creating simple interfaces after understanding Dart fundamentals and Flutter widgets. Developing professional applications requires additional experience with state management, APIs, databases, testing, architecture, and deployment.
7. What software is required for Flutter app development?
You need the Flutter SDK, Dart development tools, and a suitable code editor or IDE. Visual Studio Code and Android Studio are popular choices. Android development also requires appropriate Android SDK components, while standard iOS build and deployment workflows require macOS and Xcode.
8. What are Flutter widgets?
Flutter widgets are the basic building blocks used to create application interfaces. They represent elements such as text, buttons, images, layouts, and navigation components. Developers combine widgets into a widget tree to describe how an application screen should appear and respond to changing information.
9. What is the difference between Stateless Widget and Stateful Widget?
Stateless Widget is used for interface components that do not manage changing internal state. Stateful Widget is appropriate when a component needs to update based on changing information. For example, a static welcome message can use Stateless Widget, while an interactive counter can use Stateful Widget.
10. What is hot reload in Flutter?
Hot reload is a development feature that allows developers to apply many supported code changes to a running application without performing a complete restart. It generally preserves the current application state, making it easier to experiment with interface designs, fix errors, and develop new functionality.
11. Is Flutter better than React Native?
Neither framework is universally better. Flutter uses Dart and provides its own widget-based UI system, whereas React Native uses JavaScript or TypeScript and React components. Flutter may suit developers who prefer its UI approach, while React Native can be attractive to developers with existing JavaScript experience.
12. Can Flutter be used for web development?
Yes. Flutter supports web application development, allowing developers to reuse application logic and UI components across supported platforms. However, Flutter web is not the ideal solution for every website. Traditional web technologies may be more suitable for content-heavy websites where search engine indexing and standard web navigation are priorities.
13. Can Flutter applications work offline?
Yes. Flutter applications can provide offline functionality when developers implement appropriate local storage and offline application logic. For example, a notes application can save information locally and synchronize it when connectivity becomes available. Offline support requires careful data synchronization and conflict-handling strategies.
14. How does Flutter connect to databases?
Flutter applications can communicate with local or cloud databases using appropriate packages and backend integrations. Local options include SQLite-based storage, while Firebase provides cloud database services. Developers should select a database according to the application’s data structure, synchronization requirements, security needs, and expected usage.
15. What is state management in Flutter?
State management is the process of organizing and updating information that affects an application’s interface and functionality. Flutter provides setState() for simple local state. Larger projects may use Provider, Riverpod, or BLoC to manage shared application information in a more structured and maintainable way.
16. Can Flutter access device features such as cameras and GPS?
Yes. Flutter applications can access supported device capabilities through plugins and platform integrations. Examples include cameras, location services, sensors, notifications, and file access. Developers must configure platform permissions correctly and consider differences between Android and iOS when implementing these features.
17. Is Flutter suitable for large applications?
Flutter can be used to develop large and complex applications. However, professional projects require appropriate architecture, modular code organization, state management, automated testing, and performance monitoring. Developers should also evaluate platform integrations and package compatibility before selecting Flutter for applications with specialized requirements.
18. How do I test a Flutter application?
Flutter supports unit testing, widget testing, and integration testing. Developers can use these approaches to check business logic, individual interface components, and complete application workflows. Testing on Android emulators, iOS simulators, and physical devices also helps identify platform-specific issues before release.
19. How can I publish a Flutter application?
For Android, developers can generate a release APK or Android App Bundle and prepare the application for Google Play distribution. For iOS, they generally use Xcode to configure signing, build the application, and prepare App Store distribution. Both processes require appropriate configuration and release testing.
20. What are the best projects to practice Flutter app development?
Beginners can build a calculator, to-do list, notes application, weather app, or expense tracker. Intermediate developers can explore fitness trackers, shopping applications, and booking systems. These projects provide practical experience with widgets, navigation, state management, APIs, databases, and application architecture.
25. Conclusion: Start Your Flutter App Development Journey
Flutter app development provides an accessible and flexible approach to building modern applications for multiple platforms.
By learning Flutter and Dart, beginners can develop practical programming skills while exploring application design, user interactions, databases, APIs, and deployment.
Throughout this guide, we explored the fundamentals of Flutter, its advantages, development tools, programming concepts, widgets, state management, and practical application development.
We also discussed advanced topics such as API integration, database management, application security, performance optimization, testing, and deployment.
If you are starting your development journey, remember these important recommendations:
-
Learn Dart programming fundamentals before moving into advanced Flutter concepts.
-
Understand how Flutter widgets and layouts work.
-
Start with small applications and gradually increase project complexity.
-
Practice state management and application navigation.
-
Learn how to connect applications to APIs and databases.
-
Follow security and performance best practices.
-
Test applications on different devices.
-
Build portfolio projects to demonstrate your technical abilities.
You do not need to master every Flutter feature before creating your first application. Consistent practice and practical projects will help you develop confidence and become a more capable developer.
For students, freelancers, and aspiring software engineers, Flutter can be a valuable addition to your technical skill set.
26. Final Call to Action
Ready to improve your programming and app development skills?
Explore ToolMentors for practical tutorials, beginner-friendly programming guides, software development resources, coding tips, and useful online tools.
Continue learning, experiment with new technologies, and start building applications that turn your ideas into working products.
Learn. Build. Improve. Grow with ToolMentors.

2 Comments