
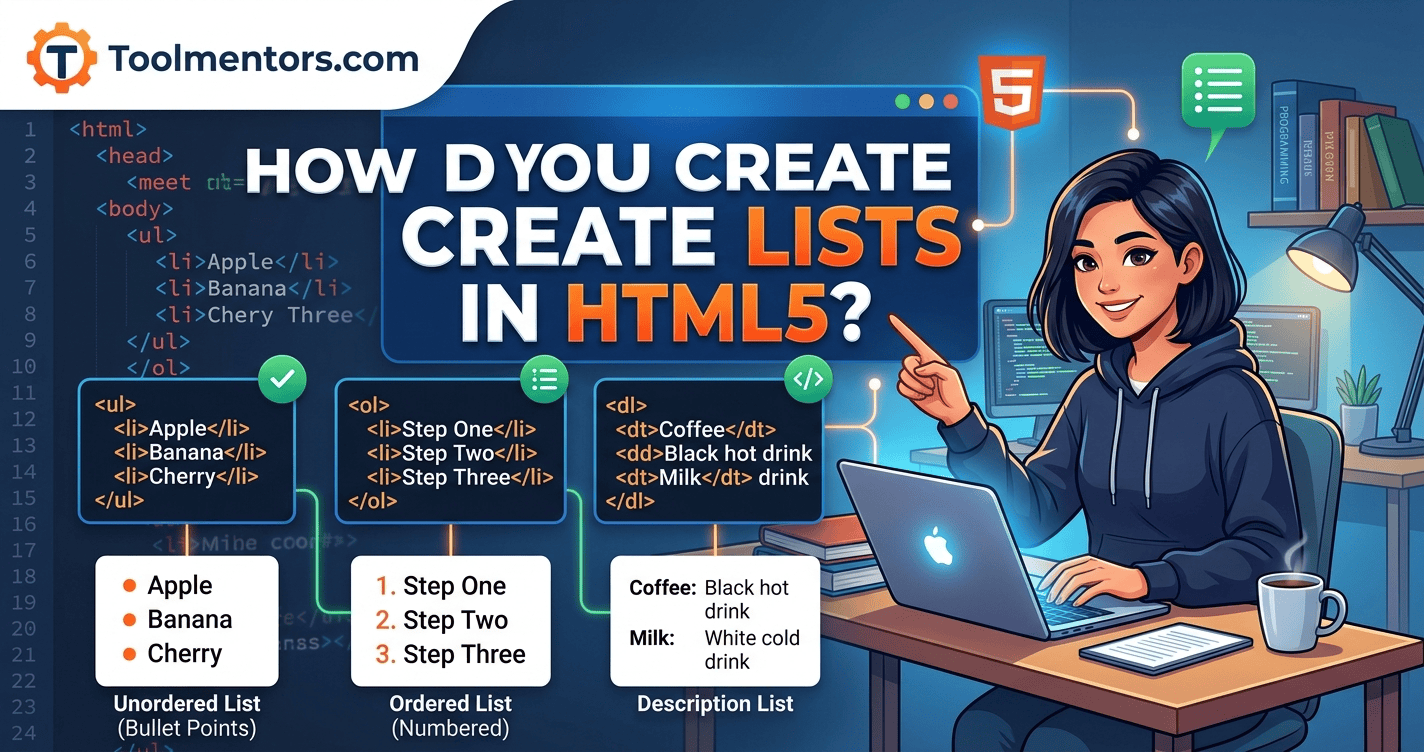
HTML5 lets you create three main types of lists: unordered lists using <ul>, ordered lists using <ol>, and description lists using <dl>. You can add list items with <li> tags, organize information clearly, and customize list styles with CSS to make your web pages more readable and accessible.
What Are Lists in HTML5?
HTML5 lists are HTML elements that organize related information into a structured format. They help developers present information in a way that is easy to scan, understand, and navigate.
Lists are commonly used on websites for navigation menus, feature summaries, instructions, shopping lists, tutorials, FAQs, and product details.
For example, imagine you are creating a website for a web development course. Instead of writing all the course topics in a single paragraph, you can use an HTML list to display each topic on a separate line.
HTML5 supports three main types of lists:
- Unordered lists: Display items with bullets.
- Ordered lists: Display items with numbers or letters.
- Description lists: Display terms alongside their descriptions.
Each list type serves a different purpose, and choosing the right one helps make your content more organized and meaningful.
1. How to Create an Unordered List in HTML5
An unordered list is used when the order of items does not matter. By default, browsers display unordered lists with bullet points.
To create an unordered list, use the <ul> element and place each item inside an <li> element.
Example of an Unordered List
<!DOCTYPE html>
<html lang="en">
<head>
    <meta charset="UTF-8">
    <meta name="viewport" content="width=device-width, initial-scale=1.0">
    <title>Unordered List Example</title>
</head>
<body>
    <h1>Web Development Skills</h1>

    <ul>
        <li>HTML5</li>
        <li>CSS3</li>
        <li>JavaScript</li>
        <li>React</li>
    </ul>
</body>
</html>
How Does This Code Work?
- The
<ul>tag creates the unordered list. - Each
<li>tag represents an individual list item. - The browser automatically displays bullet points.
- The heading explains what the list contains.
When you open this HTML file in a browser, you will see a heading followed by four bullet points.
When Should You Use Unordered Lists?
Unordered lists are useful when presenting information that does not require a specific sequence.
Common examples include:
- Website features and benefits.
- Required skills for a job.
- Product specifications.
- Ingredients in a recipe.
- Navigation menu items.
For students learning HTML5, unordered lists are one of the easiest ways to understand how HTML elements work together.
2. How to Create an Ordered List in HTML5
An ordered list is used when items must follow a particular sequence. Browsers typically display these lists with numbers, making them ideal for instructions and step-by-step processes.
To create an ordered list, use the <ol> element and add individual items using <li> tags.
Example of an Ordered List
<!DOCTYPE html>
<html lang="en">
<head>
    <meta charset="UTF-8">
    <meta name="viewport" content="width=device-width, initial-scale=1.0">
    <title>Ordered List Example</title>
</head>
<body>
    <h1>How to Create an HTML Page</h1>

    <ol>
        <li>Open a text editor.</li>
        <li>Create a new HTML file.</li>
        <li>Write the HTML structure.</li>
        <li>Save the file with an .html extension.</li>
        <li>Open the file in a web browser.</li>
    </ol>
</body>
</html>
Understanding the Ordered List
In this example, the <ol> element creates a numbered list, while each <li> element contains one step.
The browser automatically numbers the items from 1 to 5. You do not need to type the numbers manually.
This makes ordered lists particularly useful for tutorials, installation guides, registration instructions, and technical documentation.
How to Customize Ordered Lists
HTML5 supports several useful attributes for ordered lists.
The type attribute
The type attribute changes the numbering format.
<ol type="A">
    <li>Introduction</li>
    <li>HTML Basics</li>
    <li>CSS Basics</li>
</ol>
This example displays uppercase letters instead of standard numbers.
Common values include:
1— Numbers (default).A— Uppercase letters.a— Lowercase letters.I— Uppercase Roman numerals.i— Lowercase Roman numerals.
The start attribute
Use the start attribute when you want numbering to begin at a specific number.
<ol start="5">
    <li>Advanced HTML</li>
    <li>CSS Layouts</li>
    <li>JavaScript Basics</li>
</ol>
The list begins at 5 and continues with 6 and 7.
The reversed attribute
Use reversed to display list numbering in descending order.
<ol reversed>
    <li>Final Review</li>
    <li>Testing</li>
    <li>Development</li>
</ol>
These attributes are useful when building tutorials, countdowns, ranked lists, and educational resources.
3. How to Create a Description List in HTML5
A description list displays terms and their associated descriptions. Unlike ordered and unordered lists, it does not normally use bullets or numbers.
HTML5 uses three elements to create a description list:
<dl>defines the description list.<dt>identifies a term or name.<dd>provides the description or explanation.
Example of a Description List
<!DOCTYPE html>
<html lang="en">
<head>
    <meta charset="UTF-8">
    <meta name="viewport" content="width=device-width, initial-scale=1.0">
    <title>Description List Example</title>
</head>
<body>
    <h1>Web Development Terms</h1>

    <dl>
        <dt>HTML5</dt>
        <dd>Defines the structure and content of web pages.</dd>

        <dt>CSS</dt>
        <dd>Controls the appearance and layout of web pages.</dd>

        <dt>JavaScript</dt>
        <dd>Adds interactivity and dynamic behavior to websites.</dd>
    </dl>
</body>
</html>
When Should You Use Description Lists?
Description lists work well when presenting information in a term-and-definition format.
Examples include:
- Technical glossaries.
- Frequently asked questions with short answers.
- Product details.
- Course terminology.
- Contact information and metadata.
They help readers understand relationships between terms and explanations without requiring a numbered sequence.
4. How to Create Nested Lists in HTML5
A nested list is a list placed inside another list item. It allows you to organize information into main categories and subcategories.
Nested lists are particularly useful for website navigation menus, course outlines, documentation, and hierarchical information.
Example of a Nested List
<h1>Web Development Course</h1>

<ul>
    <li>Frontend Development
        <ul>
            <li>HTML5</li>
            <li>CSS3</li>
            <li>JavaScript</li>
        </ul>
    </li>

    <li>Backend Development
        <ul>
            <li>Node.js</li>
            <li>Express.js</li>
            <li>Databases</li>
        </ul>
    </li>
</ul>
How Nested Lists Work
The outer <ul> element contains the main categories, while the inner <ul> elements contain related subtopics.
Notice that each nested list appears inside its parent <li> element. This structure helps browsers and assistive technologies understand the relationship between the main item and its subitems.
Use nested lists when your content has a clear hierarchy. Avoid adding unnecessary levels because deeply nested lists can become difficult to read, especially on mobile devices.
5. How to Style HTML5 Lists with CSS
HTML5 defines the structure of a list, while CSS controls its visual appearance. You can use CSS to change bullet styles, numbering formats, spacing, colors, and alignment.
Example: Customizing an Unordered List
<!DOCTYPE html>
<html lang="en">
<head>
    <meta charset="UTF-8">
    <meta name="viewport" content="width=device-width, initial-scale=1.0">
    <title>Styled HTML List</title>

    <style>
        ul {
            list-style-type: square;
            padding-left: 25px;
        }

        li {
            margin-bottom: 10px;
            color: #333333;
            font-size: 18px;
        }
    </style>
</head>
<body>
    <h1>Benefits of Learning HTML5</h1>

    <ul>
        <li>Build structured web pages.</li>
        <li>Improve website accessibility.</li>
        <li>Develop a foundation for frontend skills.</li>
        <li>Create projects for your portfolio.</li>
    </ul>
</body>
</html>

Useful CSS Properties for Lists
list-style-type
Changes the marker displayed beside list items.
Examples include disc, circle, square, decimal, and lower-alpha.
list-style-position
Controls whether the marker appears inside or outside the list item’s content box.
ul {
    list-style-position: inside;
}
margin-bottom
Adds space between individual list items, making long lists easier to scan.
list-style
Combines list marker settings into a single declaration.
ul {
    list-style: circle;
}
You can also remove default markers when creating custom navigation menus.
nav ul {
    list-style: none;
    padding: 0;
    margin: 0;
}
For accessible navigation, remember to use appropriate navigation landmarks and descriptive link text. CSS should improve the presentation without making the underlying structure confusing.
6. Step-by-Step Guide to Creating Lists in HTML5
If you are new to web development, follow these steps to create your first HTML list.
Step 1: Open a Code Editor
Open a text editor such as Visual Studio Code, Notepad++, or another editor you prefer.
Step 2: Create an HTML File
Create a new file and save it as html-lists.html.
Step 3: Add the Basic HTML Structure
Start with the HTML document declaration and the required elements.
<!DOCTYPE html>
<html lang="en">
<head>
    <meta charset="UTF-8">
    <title>My HTML Lists</title>
</head>
<body>

</body>
</html>
Step 4: Choose the Appropriate List Type
Decide whether your information requires bullets, a specific order, or term-and-description pairs.
Use <ul> for unordered items, <ol> for sequential steps, and <dl> for descriptions.
Step 5: Add Your List Items
For ordered and unordered lists, put each item inside an <li> element. For description lists, use <dt> for terms and <dd> for their descriptions.
Step 6: Save and Preview the File
Save your changes and open the HTML file in a browser. Check that the list appears correctly and that all items are displayed.
Step 7: Add CSS Styling
Once the list works, use CSS to improve spacing, colors, markers, and readability.
Following this process helps beginners understand the relationship between HTML structure and CSS presentation.
7. Best Practices for Creating HTML5 Lists
Writing valid HTML is important, but well-structured lists also improve usability and accessibility.
Follow these best practices:
- Choose the correct element: Use ordered lists when sequence matters and unordered lists when it does not.
- Use semantic HTML: Do not replace proper list elements with manually typed bullets or numbers when the content is genuinely a list.
- Keep list items concise: Use clear, direct language that readers can understand quickly.
- Nest lists correctly: Place a nested list inside the relevant parent
<li>element. - Maintain consistent formatting: Use CSS to apply uniform spacing and styles.
- Consider accessibility: Semantic lists help screen readers identify list structures and communicate relationships between items.
- Test on mobile devices: Make sure long items wrap naturally and remain readable on smaller screens.
- Avoid unnecessary nesting: Keep the hierarchy simple so users can follow the content.
One important distinction is that not every group of paragraphs needs to become a list. Use list elements when the content represents a genuine collection of related items.
8. Common HTML5 List Mistakes to Avoid
Beginners sometimes make small mistakes that can affect the structure or appearance of their lists.
Forgetting the <li> Element
Incorrect:
<ul>
    HTML5
    CSS3
    JavaScript
</ul>
Correct:
<ul>
    <li>HTML5</li>
    <li>CSS3</li>
    <li>JavaScript</li>
</ul>
Always use <li> for individual items in ordered and unordered lists.
Using the Wrong List Type
If you are explaining a process that must happen in a particular order, use <ol> rather than <ul>. This communicates the intended sequence more clearly.
Adding Manual Numbers
Avoid manually typing numbers into every item when an ordered list can generate them automatically. Automatic numbering is easier to maintain when items are added, removed, or reordered.
Misplacing Nested Lists
A nested list should be placed within the parent list item it describes. Incorrect nesting can make the document harder to understand and maintain.
Using CSS Instead of Semantic HTML
CSS can change how content looks, but it does not replace the meaning provided by HTML elements. Start with the correct HTML structure, then use CSS to customize its appearance.
9. Why Learning HTML5 Lists Matters for Students, Developers, and Freelancers
Understanding HTML5 lists is a practical skill for anyone learning web development or building websites professionally.
For students: Lists provide an easy way to practice HTML syntax, semantic elements, indentation, and document structure. They are also a useful foundation for more advanced topics such as forms, tables, and responsive layouts.
For web developers: Lists are used throughout real-world projects, including navigation menus, product features, documentation, dashboards, and content management systems. Correctly structured lists are easier to maintain and style.
For freelancers: Clients frequently need organized service descriptions, pricing inclusions, FAQs, portfolios, and website menus. Knowing how to create lists allows freelancers to deliver clean, user-friendly layouts and make content easier to scan.
For SEO and accessibility: Search engines can interpret well-structured HTML, while assistive technologies benefit from meaningful semantic markup. Lists can improve content organization, but they do not guarantee higher search rankings by themselves.
For developers working with WordPress, React, or other frontend technologies, these concepts remain relevant because the underlying HTML structure still matters.
Conclusion
Creating lists in HTML5 is straightforward once you understand the purpose of each element. Use <ul> for unordered items, <ol> for sequential instructions, and <dl> for terms and descriptions. Combine these elements with correctly nested list items and CSS styling to create accessible, readable, and professional web pages.
Practice by building a course outline, navigation menu, or step-by-step tutorial. As you gain experience, you will find that properly structured HTML5 lists are an essential part of creating effective websites.