
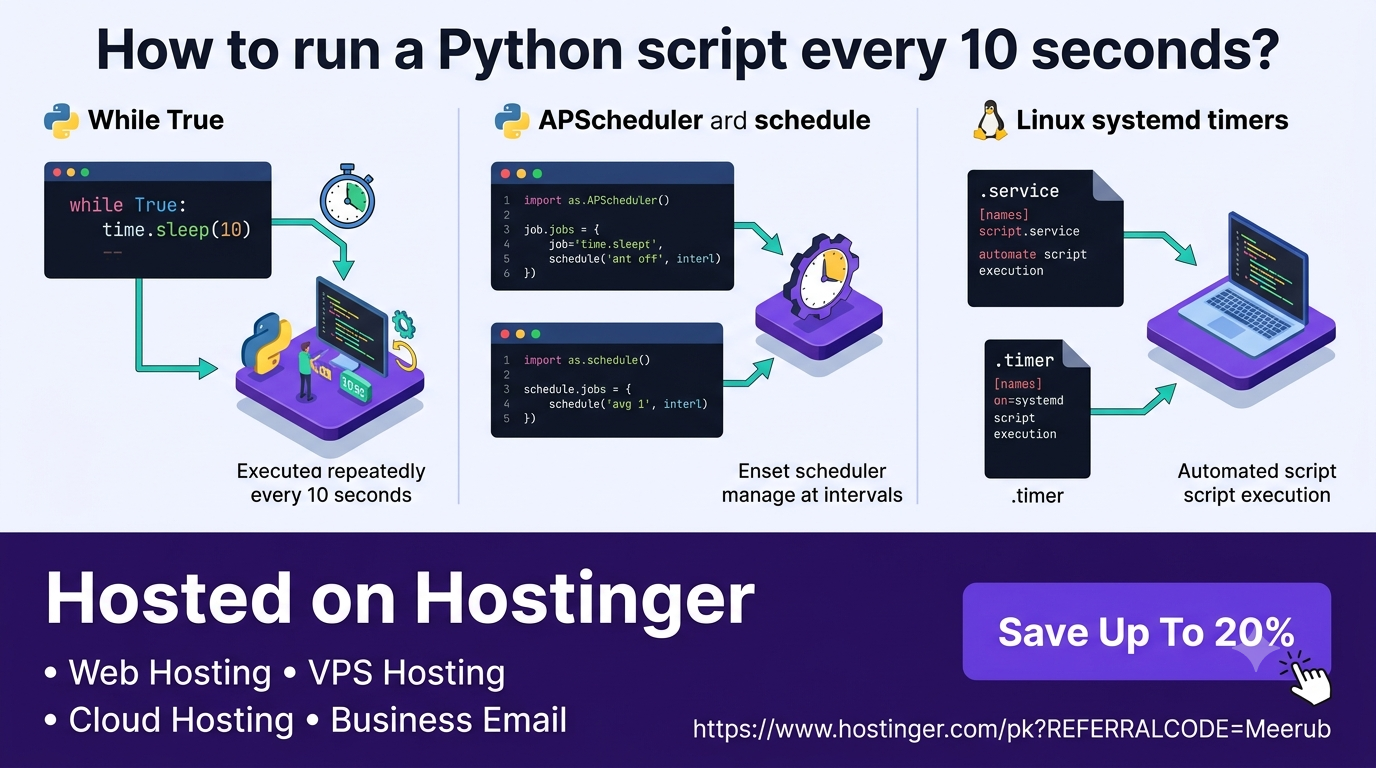
To run a Python script every 10 seconds, the most straightforward approach is using an infinite while True: loop combined with time.sleep(10) directly within your Python code. For production environments requiring 24/7 reliability, executing this continuous script as a background daemon or systemd service on a cloud server ensures uninterrupted, sub-minute execution.
The Challenge of High-Frequency Automation in Python
Automating tasks at sub-minute intervals—such as every 10 seconds—presents unique engineering challenges. Traditional operating system schedulers like Linux cron jobs are limited by design to a minimum resolution of one minute. When your project requires near-real-time performance, you must use application-level loops, specialized Python scheduling libraries, or precise system timers.
High-frequency execution is essential for a wide range of modern software applications:
-
Real-Time Data Scraping: Monitoring fast-moving financial tickers, inventory levels, or flash sales.
-
IoT & Hardware Monitoring: Polling sensor data, temperature readings, or server telemetry.
-
Instant Alerts & Webhooks: Checking queue messages, pinging API endpoints, or sending immediate notification triggers.
-
System Health Checks: Tracking server CPU usage, database connection pools, or microservice availability.
Method 1: The while True Loop with time.sleep()
The simplest and most direct method to execute code every 10 seconds is wrapping your logic inside an infinite loop with a 10-second pause interval.
Basic Code Implementation
import time

def my_task():
    print("Executing task every 10 seconds...")

# Main infinite loop
while True:
    my_task()
    time.sleep(10)
Eliminating Execution Drift
A common issue with time.sleep(10) is execution drift. If my_task() takes 2 seconds to complete, each iteration actually takes 12 seconds ($2 \text{ seconds execution} + 10 \text{ seconds sleep}$). Over time, your script shifts further away from its target schedule.
To maintain precise 10-second intervals regardless of function execution time, measure elapsed time dynamically:
import time

def my_task():
    # Simulate work that takes variable time
    time.sleep(1.5)
    print("Task completed.")

interval = 10.0

while True:
    start_time = time.time()

    # Execute primary logic
    my_task()

    # Calculate how long execution took
    elapsed_time = time.time() - start_time

    # Sleep only for the remaining portion of the 10-second window
    sleep_duration = max(0.0, interval - elapsed_time)
    time.sleep(sleep_duration)
Method 2: Python Scheduling Libraries (schedule and APScheduler)
For cleaner code structure, third-party Python libraries provide elegant abstractions over raw loops.
1. Using the schedule Library
The lightweight schedule module allows readable, human-friendly syntax:
import schedule
import time

def job():
    print("Running scheduled job...")

# Define the schedule
schedule.every(10).seconds.do(job)

# Keep the background loop active
while True:
    schedule.run_pending()
    time.sleep(1)
2. Using APScheduler (Advanced Production Scheduling)
For complex applications, Advanced Python Scheduler (APScheduler) provides non-blocking execution, background threads, and persistence:
from apscheduler.schedulers.background import BackgroundScheduler
import time

def job():
    print("Executing background job every 10 seconds...")

scheduler = BackgroundScheduler()
scheduler.add_job(job, 'interval', seconds=10)
scheduler.start()

# Prevents the main script thread from exiting
try:
    while True:
        time.sleep(1)
except (KeyboardInterrupt, SystemExit):
    scheduler.shutdown()
Method 3: System-Level Execution with systemd Timers (Linux / VPS)
When deploying to a production server, running an interactive Python process in a terminal window is risky—if your terminal closes, the script stops. Using a Linux systemd service and timer guarantees your 10-second script runs continuously in the background and restarts automatically if the server reboots or crashes.
Step 1: Create the Systemd Service Unit File
Create a service file at /etc/systemd/system/python_10s.service:
[Unit]
Description=Python 10-Second Worker Service
After=network.target

[Service]
Type=simple
ExecStart=/usr/bin/python3 /home/user/app/script.py
Restart=always
RestartSec=3

[Install]
WantedBy=multi-user.target
Step 2: Create the Systemd Timer Unit File
Create a matching timer file at /etc/systemd/system/python_10s.timer:
[Unit]
Description=Runs Python Service Every 10 Seconds

[Timer]
OnBootSec=10sec
OnUnitActiveSec=10sec
AccuracySec=1ms

[Install]
WantedBy=timers.target
Step 3: Enable and Start the Timer
sudo systemctl daemon-reload
sudo systemctl enable --now python_10s.timer
Real-World Benefits for Developers, Students, and Freelancers
Mastering sub-minute Python execution unlocks powerful development opportunities:
-
For Freelancers: Deliver enterprise-grade automation solutions to clients—such as live exchange rate trackers, automated inventory syncs, or social media listening tools—that command higher project fees.
-
For Developers: Build resilient background microservices, event listeners, and API pollers that integrate seamlessly into larger software architectures.
-
For Students: Create impressive portfolio projects like crypto trading bots, dynamic IoT dashboards, or real-time system monitors that showcase advanced software engineering skills.
Running Your High-Frequency Scripts 24/7 on Hostinger VPS
Executing a script every 10 seconds locally on a personal laptop or desktop computer is impractical. If your laptop enters sleep mode, loses Wi-Fi connection, or shuts down, your automated workflow halts completely.
To achieve 99.9% uptime for continuous Python workers, hosting your code on a reliable cloud server is essential. Hostinger VPS Hosting provides the optimal environment for running background daemons, API pollers, and high-frequency automation scripts.
Key Advantages of Hostinger VPS for Python Automation:
-
Uninterrupted 24/7 Performance: Powered by fast NVMe storage and powerful hardware, Hostinger VPS ensures your background processes run continuously without lag.
-
Dedicated Root Access: Enjoy total administrative control to install custom Python versions, virtual environments, background daemons, and systemd services.
-
High-Speed Network Connection: Exceptional network stability guarantees your fast-polling scripts never miss an external API call or database update due to connection drops.
-
Cost-Effective Scaling: Easily scale your server CPU, RAM, and bandwidth as your automation tasks grow, making it perfect for indie developers and freelancers.
Deploying Your Python Script on Hostinger VPS:
-
Connect via SSH: Access your Hostinger server instantly from your terminal:
Bashssh root@your_vps_ip -
Environment Setup: Install Python and configure your project folder:
Bashsudo apt update && sudo apt install python3 python3-pip python3-venv -y mkdir automation && cd automation python3 -m venv venv source venv/bin/activate -
Run as a Background Process: Use
nohupfor quick background execution or set up a fullsystemdunit for production-grade reliability:Bashnohup venv/bin/python3 script.py > output.log 2>&1 &
Essential Best Practices for High-Frequency Loops
To maintain long-term server stability when executing scripts at 10-second intervals:
-
Robust Exception Handling: Wrap loop bodies in
try-exceptblocks so a temporary network failure or API error does not crash the entire process. -
Resource Management: Close database connections, HTTP sessions, and file handles cleanly during each loop iteration to prevent memory leaks.
-
Log Rotation: Avoid filling server storage by implementing rotating log files using Python’s built-in
logging.handlers.RotatingFileHandler. -
Respect API Rate Limits: When polling third-party endpoints every 10 seconds, ensure your request volume remains well within vendor rate limits to prevent IP blocks.
Upgrade Your Python Automation Infrastructure Today
Don’t let laptop sleep modes or home internet outages interrupt your automated workflows. Take your Python automation scripts, trading bots, and background workers to the cloud with enterprise-grade server hosting.
Get an EXCLUSIVE 20% DISCOUNT across Hostinger hosting and VPS packages to power your web applications and Python projects with maximum speed and reliability.
Claim Your Exclusive 20% Hostinger Discount Now
Enter promo code Meerub at checkout to unlock your 20% savings immediately.