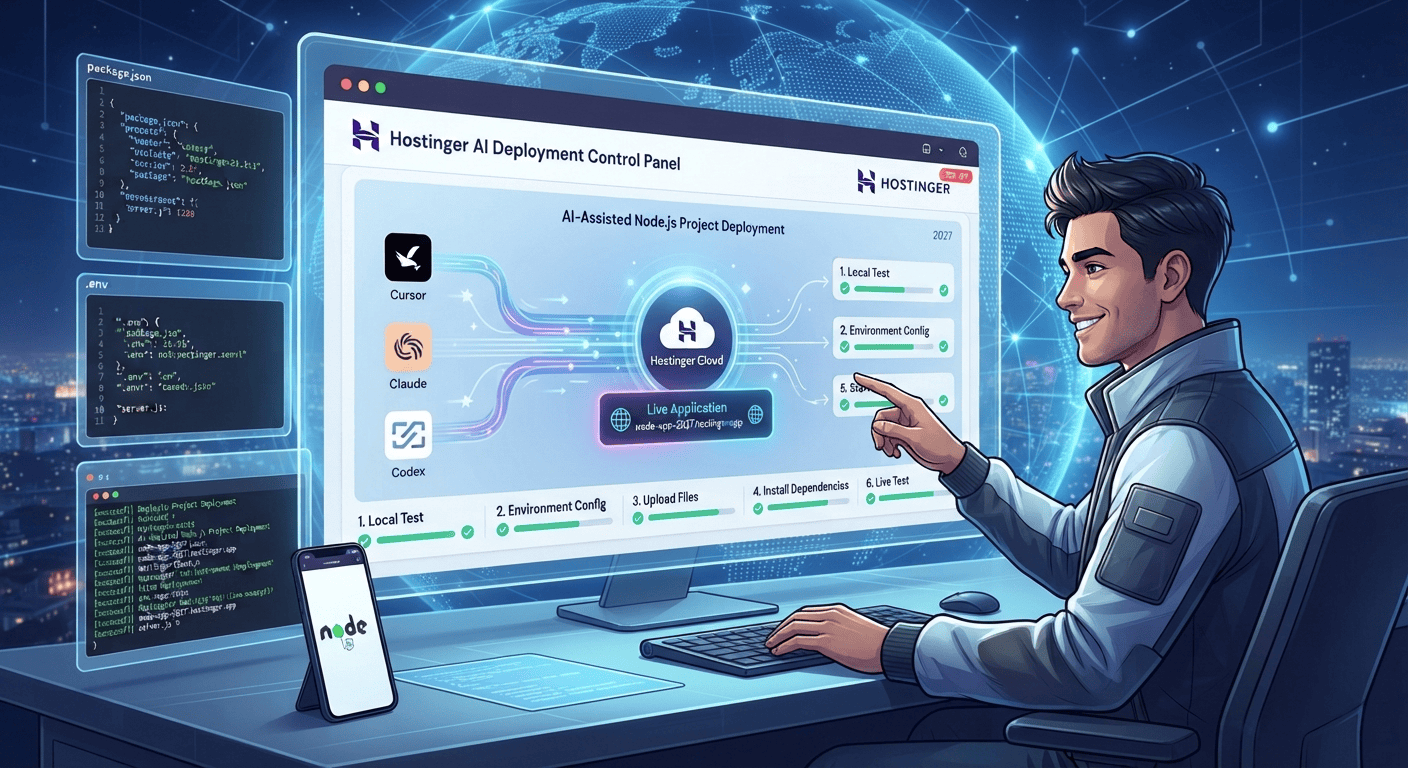
If you built a Node.js project with Cursor, Claude, or Codex, you can deploy it to Hostinger by preparing the project, uploading the files, installing dependencies, configuring environment variables, and starting the Node.js application.
The exact deployment process depends on your Hostinger plan and its current Node.js support, but the overall workflow is similar for most AI-generated Node.js projects.

AI coding tools have changed the way developers build applications. Instead of writing every function manually, developers can now use tools such as Cursor, Claude, and Codex to generate code, create project structures, fix errors, and improve existing applications.
This makes it possible for students, freelancers, entrepreneurs, and developers to build Node.js applications much faster.
However, creating a Node.js project is only the first step. Eventually, you need to move the application from your computer to a production hosting environment.
If you have created a Node.js project using Cursor, Claude, or Codex and want to deploy it to Hostinger in 2027, this guide explains the complete workflow.
What Are Cursor, Claude, and Codex?
Before looking at deployment, it helps to understand the role of these AI development tools.
Cursor
Cursor is an AI-powered code editor designed to help developers write, understand, modify, and troubleshoot code. You can use AI instructions inside your development workflow to create new files, refactor existing code, and diagnose errors.
Claude
Claude can assist with software development by generating code, explaining programming concepts, reviewing files, and helping developers troubleshoot applications.
Codex
Codex can be used as an AI coding assistant for software development tasks, helping developers work with code, repositories, and programming workflows.
The important point is that these tools help you create the application, but they do not automatically mean that the application is hosted online.
You still need a suitable hosting environment.
What You Need Before Deploying
Before uploading your project to Hostinger, make sure you have the following:
- A completed Node.js project
- Node.js installed on your computer
- A
package.jsonfile - Your application startup file
- All required dependencies
- Environment variables
- Database credentials if your app uses a database
- A Hostinger plan that supports the Node.js application requirements
- A domain or subdomain if you want the application accessible through a custom URL
A typical project might look like this:
my-node-app/
├── package.json
├── package-lock.json
├── server.js
├── .env
├── .gitignore
├── routes/
├── controllers/
├── models/
├── middleware/
└── public/
Your actual structure will depend on how Cursor, Claude, or Codex created the application.
Step 1: Test Your AI-Generated Node.js Project Locally
Never deploy an AI-generated application without testing it first.
Open your project folder in your terminal and install the dependencies:
npm install
Then start your application:
npm start
Some projects may use:
npm run dev
instead.
Open the local address provided by your application and test the important functionality.
Check:
- Homepage
- Forms
- API endpoints
- Login and registration
- Database operations
- File uploads
- Authentication
- Third-party APIs
- Error handling
If the application doesn’t work locally, deploying it to a server will not automatically fix the problem.
Step 2: Check Your package.json File
The package.json file is one of the most important files in a Node.js application.
Open it and check the scripts section.
For example:
{
  "name": "my-node-app",
  "version": "1.0.0",
  "scripts": {
    "start": "node server.js"
  }
}
The start command tells the hosting environment how to launch your application.
Your startup file could instead be:
app.js
or:
index.js
depending on how your project was generated.
If you’re unsure, ask your AI coding assistant:
“Review my package.json and tell me which command should be used to start this Node.js application in production.”
Step 3: Make the Application Production-Ready
AI-generated code may work perfectly on your computer but still need adjustments before production deployment.
One important consideration is the application port.
Instead of hardcoding a port, use an environment variable:
const PORT = process.env.PORT || 3000;

app.listen(PORT, () => {
    console.log(`Server running on port ${PORT}`);
});
This gives the hosting environment flexibility to provide the required port.
You should also review:
- Security
- Database connections
- API keys
- Authentication
- Input validation
- Error handling
- Logging
- Dependency versions
- File permissions
Step 4: Protect Your Environment Variables
AI-generated projects frequently use environment variables.
For example:
DATABASE_URL=your_database_url
API_KEY=your_api_key
JWT_SECRET=your_secret
Do not publish sensitive credentials inside your source code.
Also avoid committing your .env file to a public Git repository.
Your .gitignore file should normally include:
node_modules/
.env
You can then configure the necessary environment variables in your hosting environment.
Step 5: Choose a Hostinger Plan That Supports Your Application
This is an important step.
Not every hosting plan necessarily provides the same application features. Before deployment, check the current Hostinger plan specifications and Node.js support for the application you want to run.
Your requirements may be very different if you have:
- A simple Express API
- A database-driven application
- An AI-powered application
- A file-processing application
- A high-traffic SaaS platform
- A background worker
- A resource-intensive backend
For a small project, your resource requirements may be modest. A larger application may require additional CPU, RAM, storage, or other server capabilities.
Step 6: Prepare Your Project for Upload
Before uploading your Node.js project, remove unnecessary local files.
You generally don’t need to upload:
node_modules/
because dependencies can normally be installed on the server using your package configuration.
Your project should contain the files required to install and run the application.
Important files may include:
package.json
package-lock.json
server.js
routes/
controllers/
models/
public/
The exact files depend on your project.
Step 7: Upload the Node.js Project to Hostinger
Once your Hostinger environment is ready, upload your project using the deployment method available for your selected plan.
Depending on the available workflow, you may use the hosting control panel, Git-based deployment, or another supported file/deployment method.
After the files are available on the server, configure the Node.js application according to Hostinger’s current interface.
You may need to specify:
- Node.js version
- Application root
- Startup file
- Application URL
- Environment variables
- Start command
The exact labels can change as hosting platforms update their control panels, so follow the current instructions shown in your Hostinger account.
Step 8: Install Node.js Dependencies
After uploading the project, the server needs the packages defined in your package.json.
A typical installation command is:
npm install
For production environments, you may also encounter:
npm install --omit=dev
The correct command depends on your project and deployment environment.
If your AI-generated application requires packages such as Express, Axios, Mongoose, dotenv, or other dependencies, they should be declared properly in package.json.
Step 9: Configure the Startup File
Your Node.js application needs to know which file launches the server.
For example:
server.js
If your project uses server.js, make sure the hosting configuration points to that file where required.
If the project uses:
index.js
then configure the appropriate startup file instead.
Don’t assume that every Node.js application uses the same filename.
Step 10: Configure Your Domain or Subdomain
After your Node.js application is running, connect the desired domain or subdomain.
For example:
api.example.com
could be used for an API while:
www.example.com
could be used for the main website.
Your exact DNS and application configuration will depend on your domain setup and Hostinger environment.
Once configured, test the live URL.
Step 11: Test the Live Application
Don’t stop after seeing the homepage.
Test the complete application.
For an API, test endpoints such as:
GET /
GET /api/users
POST /api/contact
For a web application, test:
- Navigation
- Forms
- Login
- Registration
- Database functionality
- API requests
- Images
- JavaScript
- Mobile responsiveness
If something fails, check your application logs and server configuration.
How Cursor, Claude, and Codex Can Help With Deployment Errors
One major advantage of AI coding assistants is that they can also help after deployment.
Suppose your application displays:
Cannot find module 'express'
You can provide the error to your AI assistant and ask:
“My Node.js application on Hostinger is returning this error. Explain the likely cause and give me the exact troubleshooting steps.”
Similarly, if your application returns a database connection error, provide the complete error message rather than only saying “database isn’t working.”
Useful information includes:
- Exact error
- Relevant code
package.json- Node.js version
- Startup command
- Environment variable names
- Server logs
Never share private passwords, API keys, or other sensitive credentials.
Common Problems When Deploying AI-Generated Node.js Apps
Missing Dependencies
Your application may fail because a package exists locally but isn’t properly declared in package.json.
Run:
npm install
and verify your dependency configuration.
Incorrect Startup File
If your hosting environment is configured for server.js but your actual application starts from index.js, the application may not launch correctly.
Environment Variables Missing
An application may work locally because your .env file contains required values, while the production server does not have those variables configured.
Node.js Version Differences
Your project may rely on features supported by a particular Node.js version. Make sure the production environment is compatible with your application’s requirements.
Database Connection Problems
A local database connection may not work from your production server.
Check:
- Database URL
- Credentials
- Network access
- Database permissions
- Environment variables
Hardcoded Local Paths
AI-generated applications sometimes contain paths designed for a developer’s computer.
For example:
C:\Users\Developer\project\
Such paths should not be used in production.
Why AI + Node.js + Hosting Is Useful for Freelancers
The combination of AI coding tools and web hosting can be particularly useful for freelancers.
A freelancer can use Cursor, Claude, or Codex to accelerate tasks such as:
- Creating application prototypes
- Building APIs
- Generating repetitive code
- Fixing bugs
- Writing documentation
- Creating database models
- Building admin dashboards
- Testing API endpoints
- Preparing deployment configurations
Instead of spending hours creating boilerplate code, developers can focus more time on project requirements, testing, security, and client-specific functionality.
Benefits for Students
Students can also use this workflow as a learning environment.
For example, you could build:
- A task manager
- Student dashboard
- Expense tracker
- Notes application
- REST API
- Portfolio backend
- Simple AI-powered tool
The important thing is to understand the code rather than blindly copying it.
Ask your AI assistant to explain each major component and then modify the project yourself.
AI-Generated Code Still Needs Human Review
One important point should not be ignored: AI-generated code is not automatically production-ready.
Before launching your project, review:
- Security
- Authentication
- Authorization
- Input validation
- Database permissions
- API security
- Dependency vulnerabilities
- Error handling
- Performance
- Backup requirements
AI can accelerate development, but testing and human review remain essential.
Final Checklist for Deploying to Hostinger
Before considering your project finished, use this checklist:
- Project works locally
-
package.jsonis configured - Production start command works
- Node.js version is compatible
- Dependencies are listed correctly
-
.envsecrets are protected - Database connection works
- Startup file is correct
- Hostinger plan supports your application
- Domain/subdomain is configured
- HTTPS is working where applicable
- API endpoints have been tested
- Application logs have been checked
- Security settings have been reviewed
Conclusion
Deploying a Node.js project created with Cursor, Claude, or Codex to Hostinger in 2027 doesn’t have to be complicated. The most important part is understanding that AI-assisted development and hosting are two separate stages.
Cursor, Claude, and Codex can help you create and troubleshoot your application, while your hosting environment provides the infrastructure needed to make the application available online.
Start by testing the project locally, verify package.json, protect environment variables, select a Hostinger plan that supports your Node.js requirements, upload the project, install dependencies, configure the startup file, and test the live application.
For students and freelancers, this workflow can turn an AI-generated Node.js project into a real online application while also providing valuable practical experience with backend development and deployment.
🚀 Get 75% Off Hostinger
Ready to deploy your AI-generated Node.js project?
Get started with Hostinger and take your Node.js application from your local computer to the web. An exclusive 75% discount is available through the referral offer below.
👉 Get Your Exclusive 75% Discount
Whether you created your application with Cursor, Claude, Codex, or another AI coding assistant, make sure you choose a hosting environment that matches your application’s technical and resource requirements.