
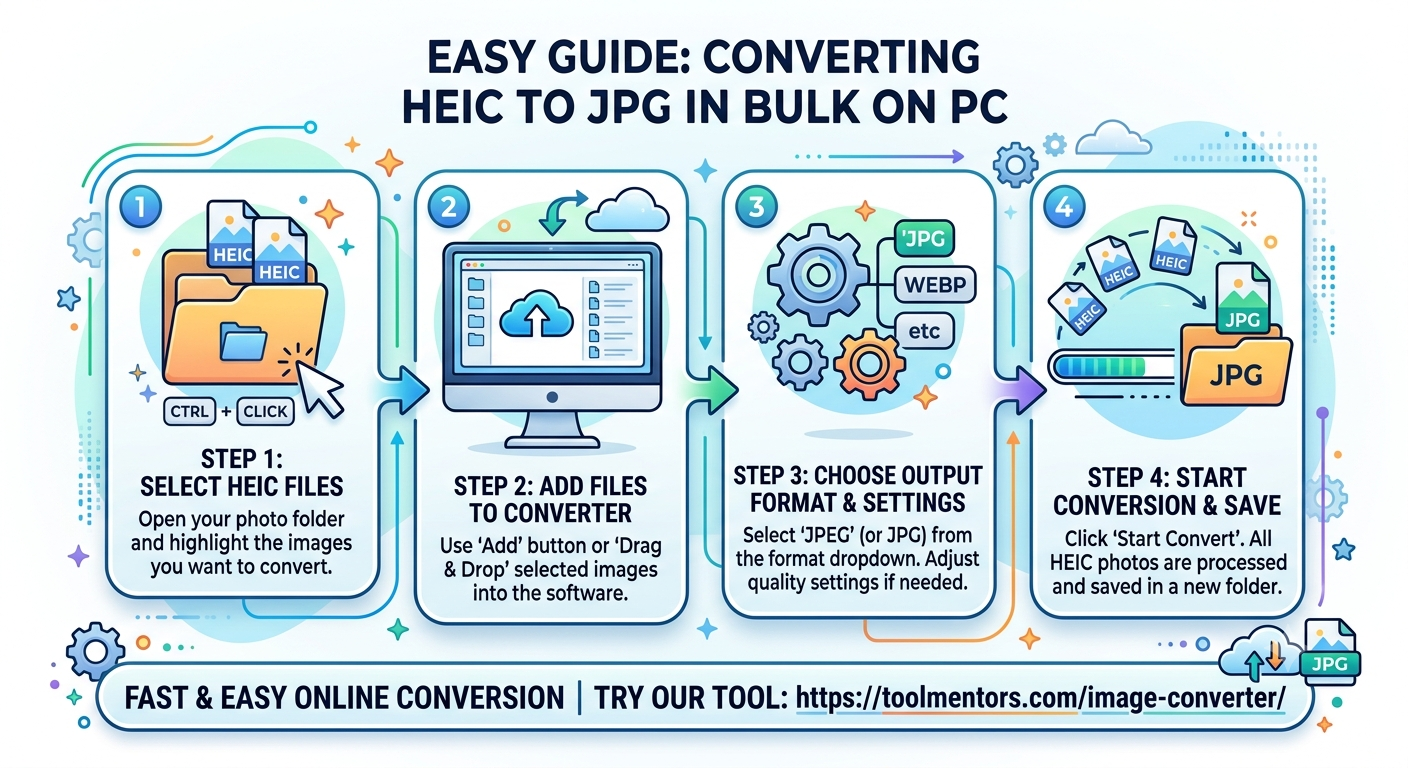
If you have recently transferred photos from an iPhone to your Windows PC, you probably noticed they are saved as HEIC files. While HEIC is great for saving storage space on your phone, Windows and many websites still struggle to open them.
When you have dozens or hundreds of these images, converting them one by one is an absolute headache. Fortunately, converting them in bulk on a PC is incredibly simple.
Here are the most effective methods to convert your HEIC photos to JPG in large batches.
Method 1: The Quickest Way (Using a Free Online Tool)
If you want to get the job done instantly without downloading or installing any heavy software onto your computer, using a dedicated online converter is your best option.
Method 2: Using the Windows Photos App
Windows has a built-in method if you have the correct extensions installed, though it requires a few more clicks for massive batches.
-
Select the HEIC images you want to change inside your File Explorer.
-
Right-click, select Open with, and choose Photos.
-
Once open, click the three horizontal dots (…) at the top dashboard menu and click Save as.
-
Change the drop-down format from
.heicto.jpgand select your destination folder.
Note: This native method works best for small groups of images. For hundreds of files at once, the app can occasionally freeze or slow down your PC performance.
Method 3: Change Your Future iPhone Settings
To save yourself from doing this every single time you move files over to your PC, you can actually force your iPhone to automatically convert these photos to JPG whenever you transfer them to a computer.
-
Open Settings on your iPhone.
-
Scroll down and tap Photos.
-
Scroll all the way to the bottom to the Transfer to Mac or PC section.
-
Switch the checkmark from Keep Originals to Automatic.
Now, whenever you share photos to your PC via a USB cable, your iPhone will handle the conversion automatically behind the scenes.
The Recommended Solution
If you currently have a folder full of images waiting to be updated right now, you can skip the hassle of installing desktop programs. Feel free to use our free batch tool at ToolMentors Image Converter. It allows you to safely upload your files, convert them in bulk completely free, and get your JPG files back in seconds without sacrificing the original quality of your photography.